

Hey, ya’ll! It’s been a bit busy around here with this pantry makeover. I know I’ve mentioned it a few times but I haven’t really posted many pictures because it wasn’t really to the point that I was quite loving it.
How many times does it take to get a pantry just right?
Well, after seven days and about seven different configurations, I think I have it where I like LOVE it. The best part is that this isn’t permanent(although it could be) and it would be a great option for anyone renting or just needing something temporary. It has definitely brought things to my attention and helped me create a better flow for our kitchen areas. Here is the post about my original DIY Pantry that I have been missing!
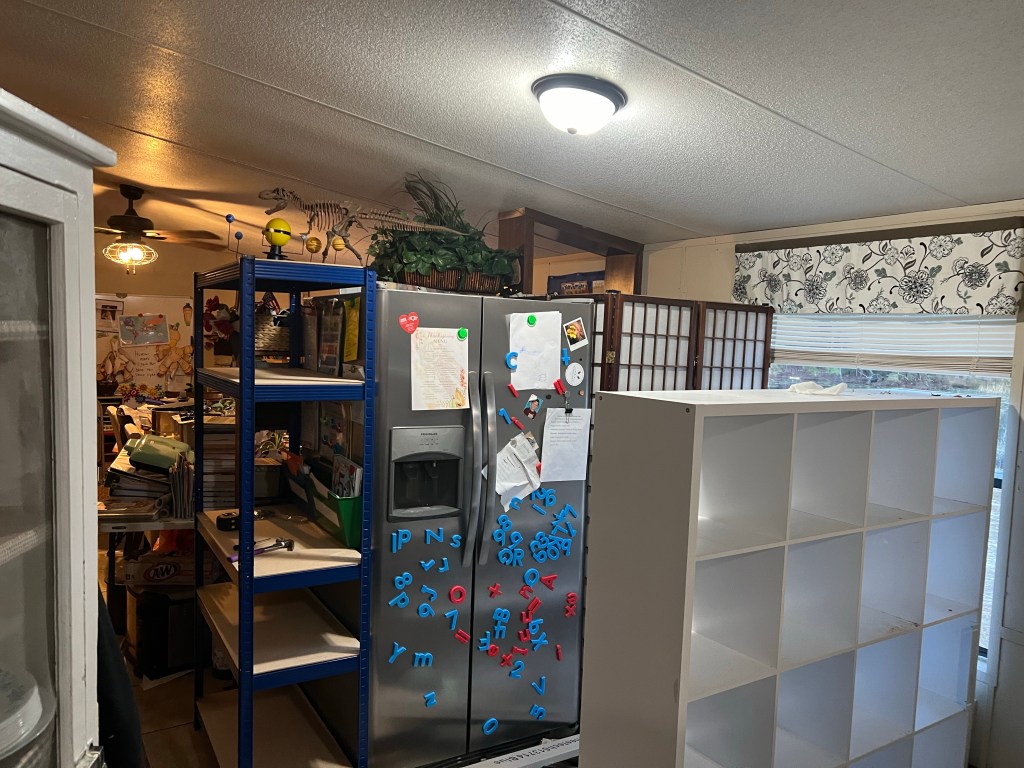
Here is the best picture I have of where we started from:
It worked but it wasn’t the best use of space and I just wasn’t happy with it. We have a second refrigerator to the left of this picture and I really didn’t like it being in that area.
We had drawn up some ideas to build a room here to use as a walk-in pantry but we decided that we needed to do some other projects before we do this so I needed to do something very budget-friendly as Christmas is coming up soon too! I’ll post links for the supplies at the end of the post.
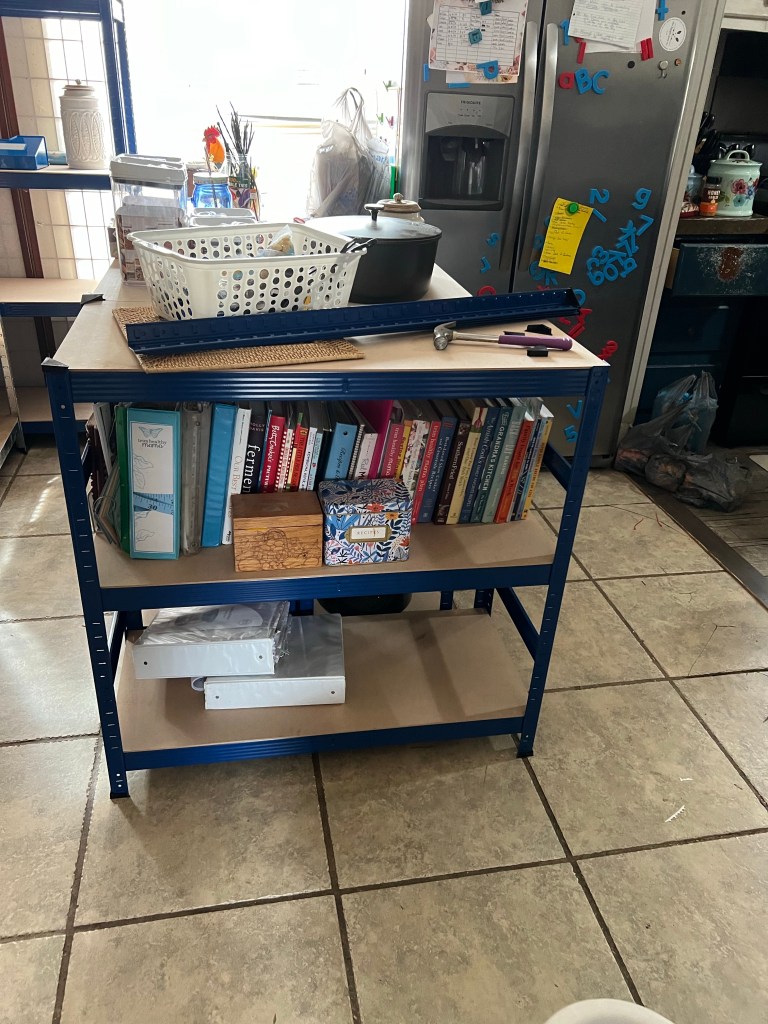
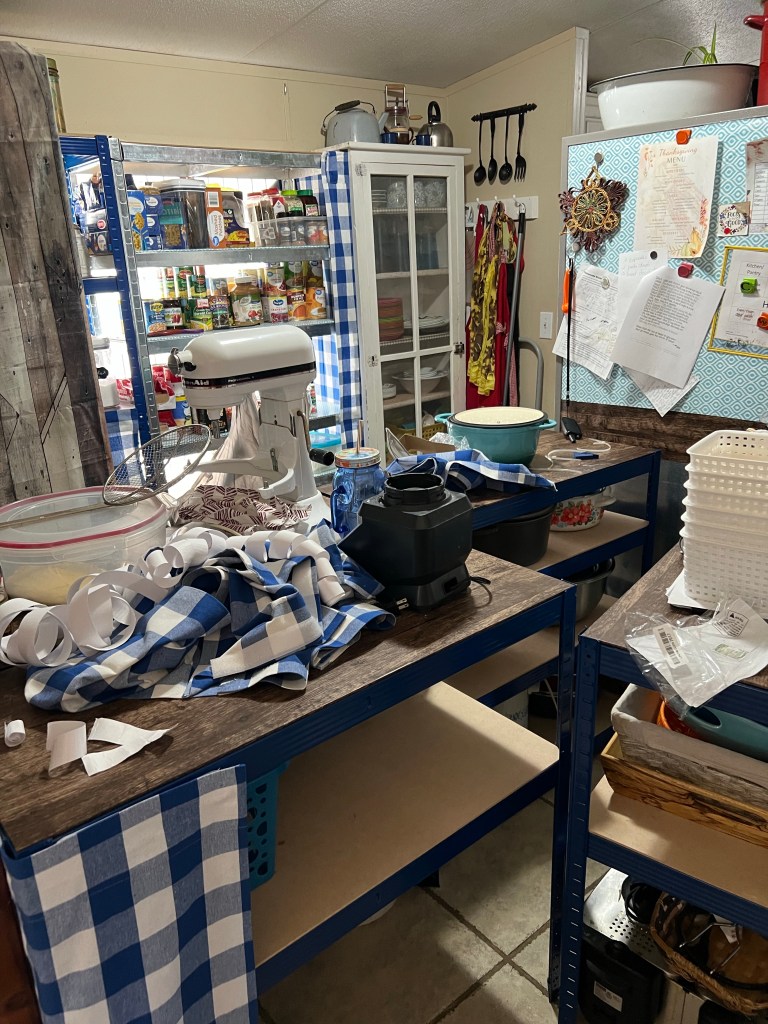
Here are a few ‘in progress’ pictures:
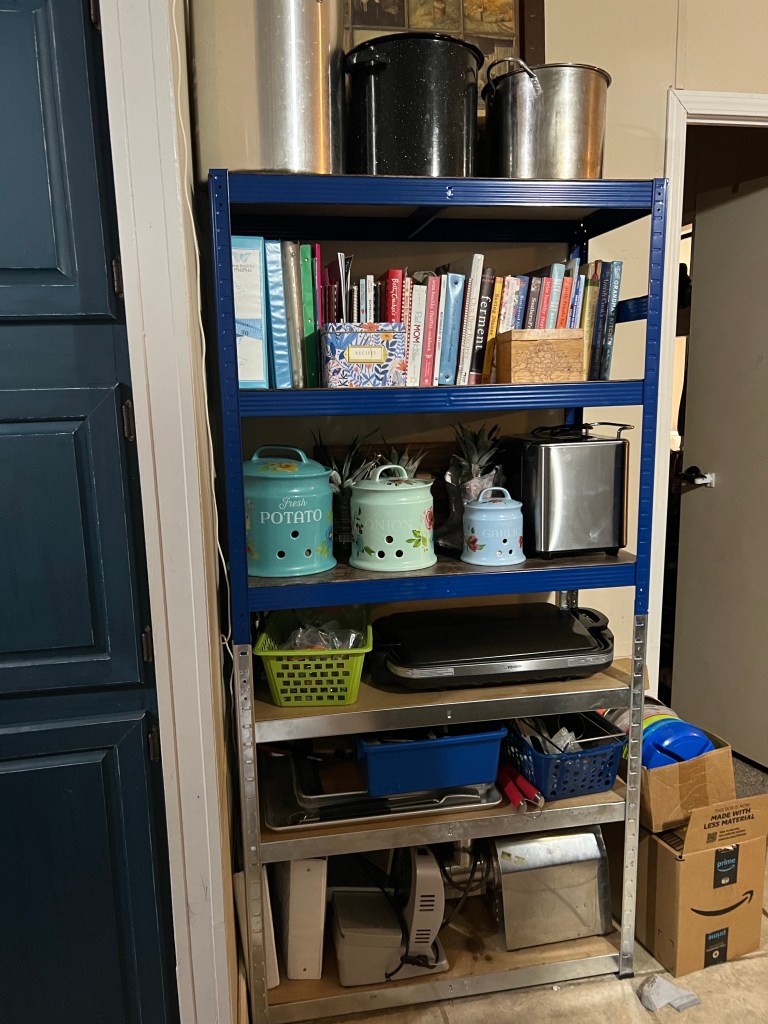
It was such a mess! This was the first configuration (minus the cube shelf which will be repurposed in one of the bedrooms):
This was not my original plan but somehow I had miscalculated by about an inch and my plan wouldn’t come together as I’d hoped so I had to reconfigure the first time. We have a weird built-in bookcase with a counter and I had not allowed for the overhang on the counter and I didn’t want to rip out the whole thing so that meant I had to reconfigure my ‘perfect plan’.
I actually had an ‘island’ where the cube shelf is but I didn’t get a picture of it. We were exhausted and the kids just put the food back into the pantry (we had used two shelves to make it deeper) and it wasn’t well organized. The next day I had to rearrange it as I couldn’t get to the food in the back of the pantry and it was inconvenient to walk around the island to get to the refrigerator.
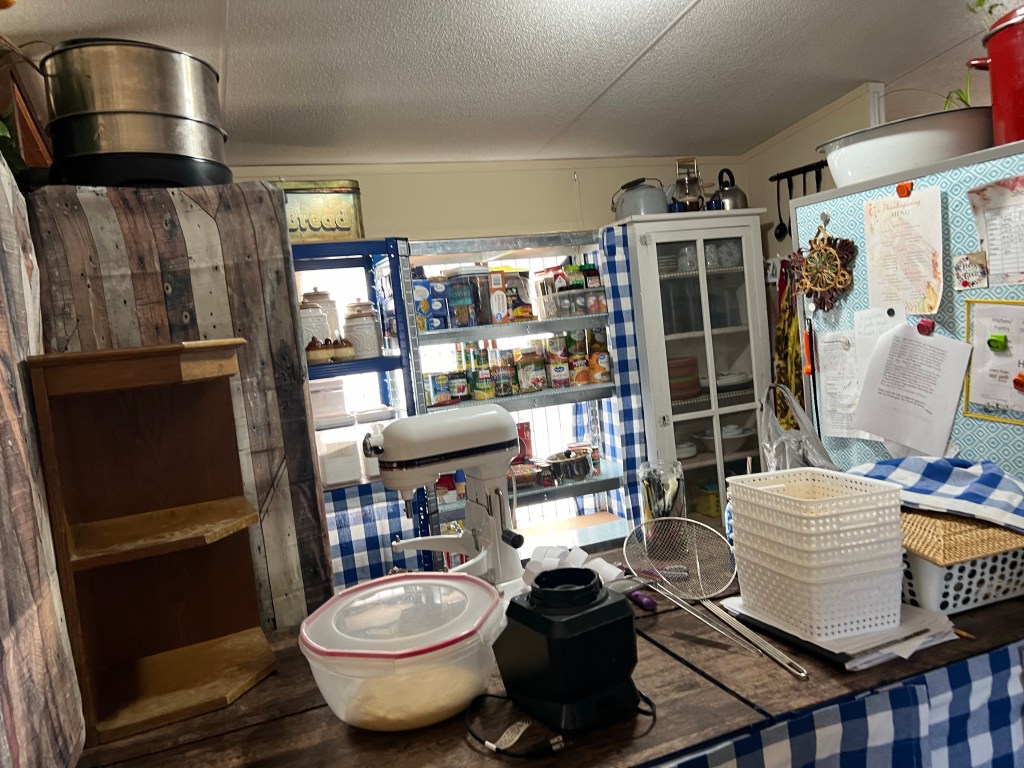
Here are some pics of the next couple of configurations mixed together:

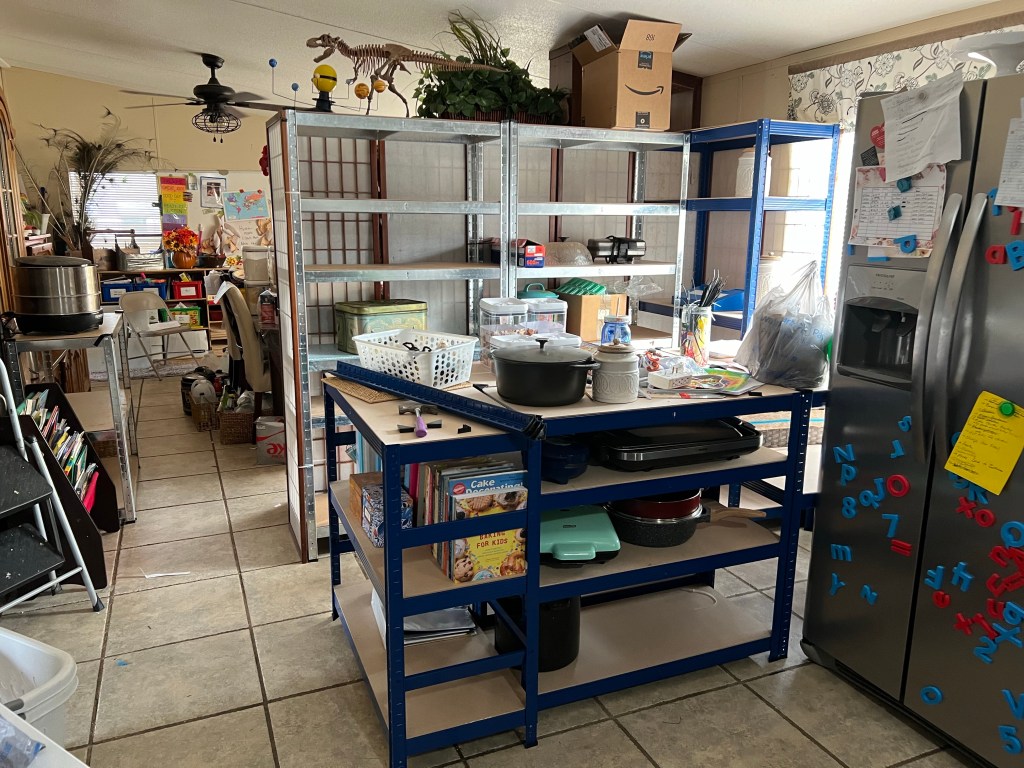

Each time we reconfigured it was better than it had been… it just took so much work to reconfigure and move everything! It was a pain to undo the clips that held the shelves together. I also used a whole lotta zip ties to hold things together as well as hang up the curtain rods on the tall shelves.
We did add some shelf paper to make the shelves look a bit nicer. I really like the wood-look paper and the way it looks with the blue shelves! (Links at the bottom.)
The fridge didn’t have quite enough clearance to completely open the freezer and I knew that would become a problem later on so back to the drawing board again.
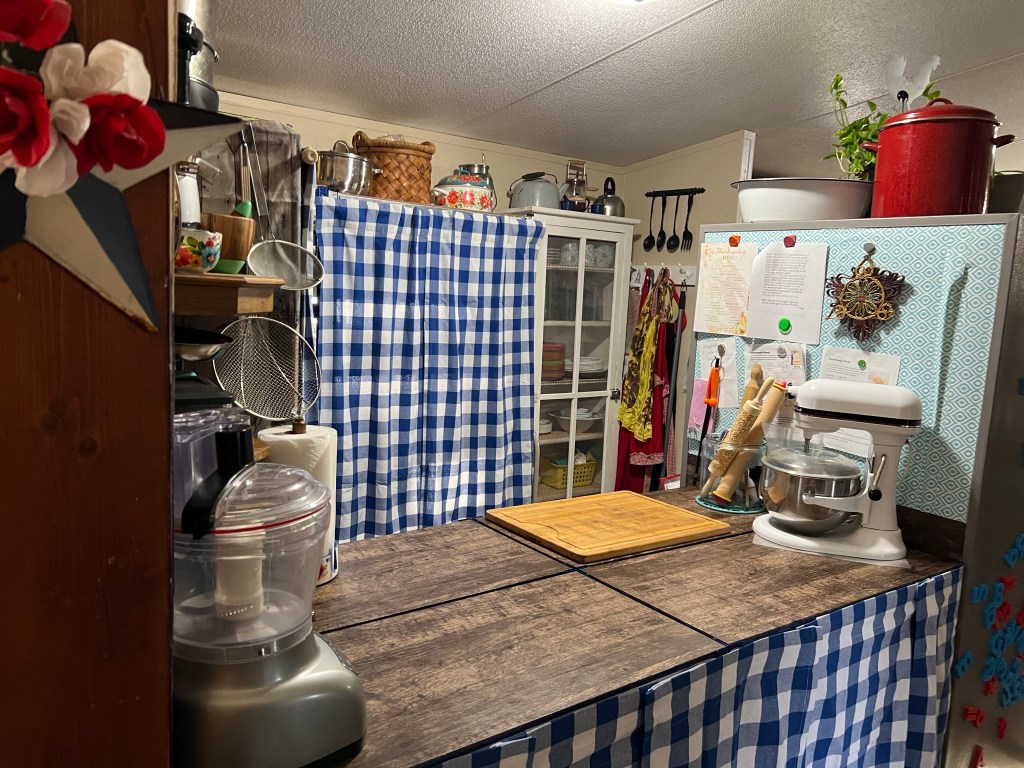
Here are the next couple of configurations as apparently I didn’t take pictures between them:
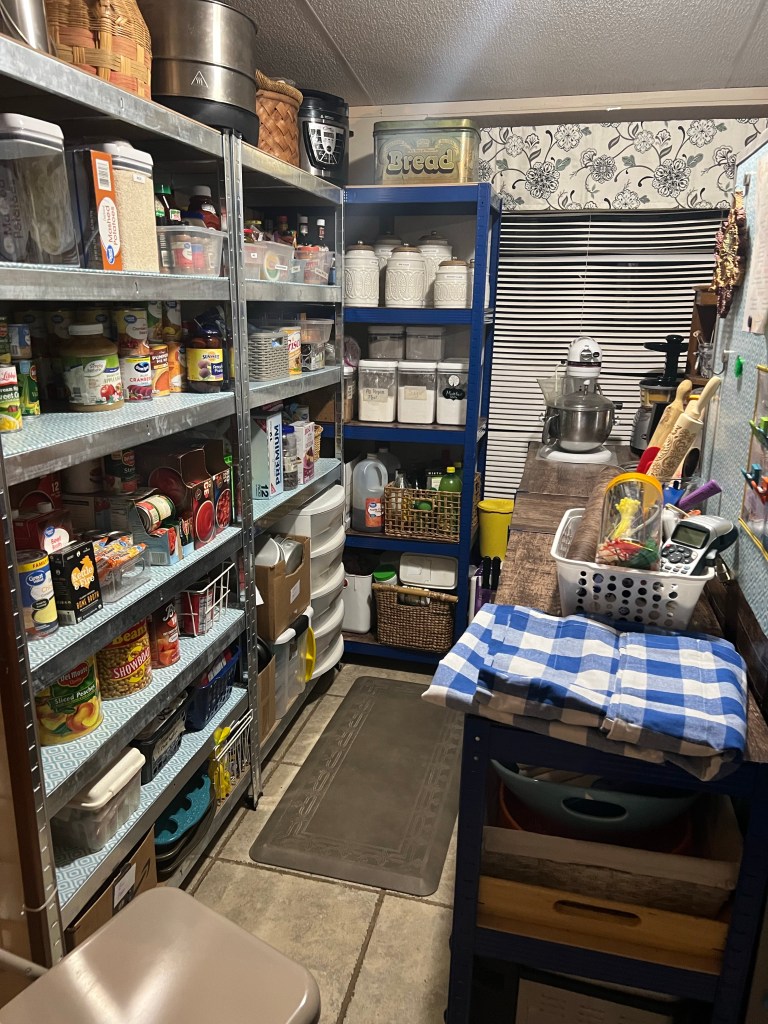
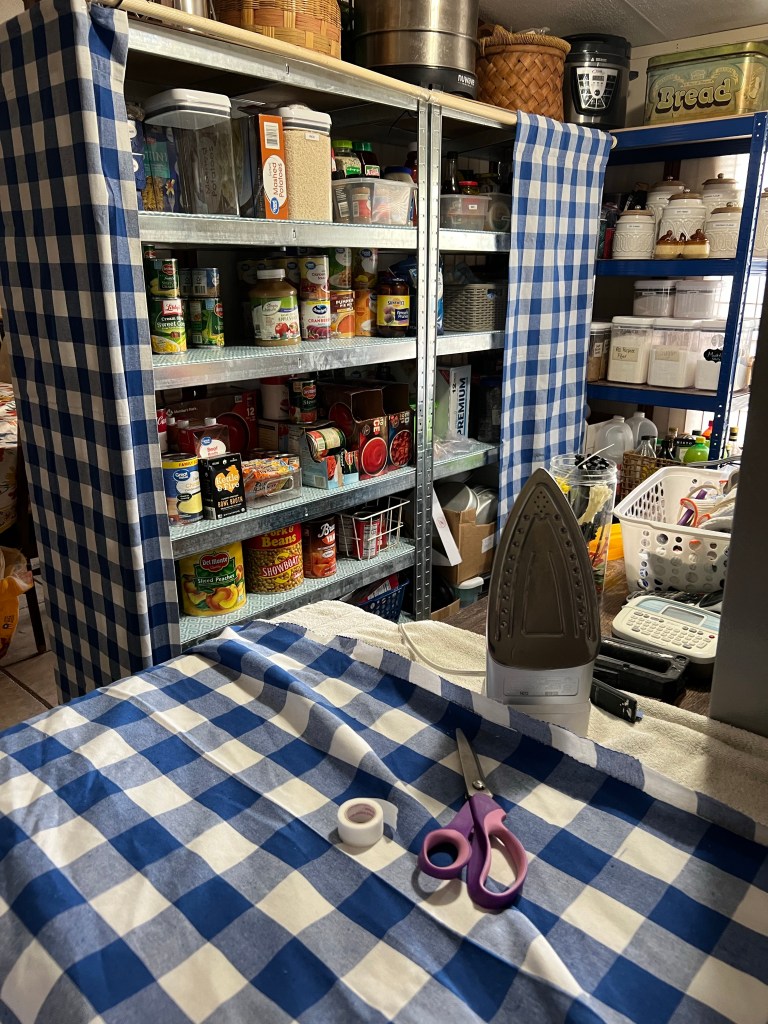
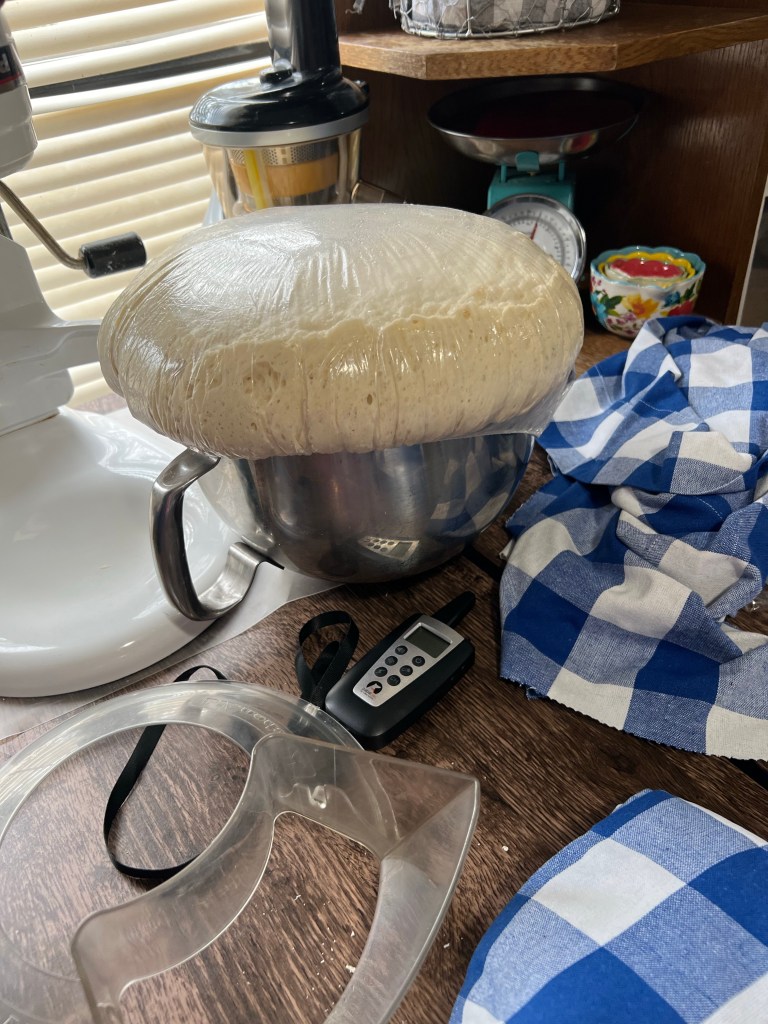

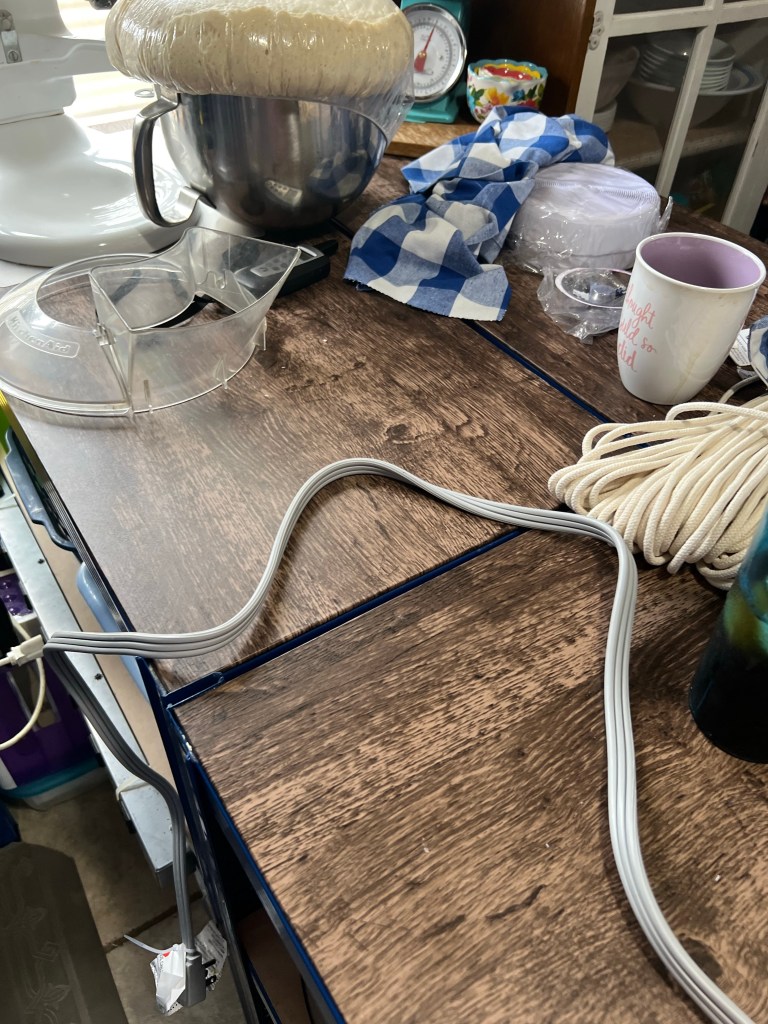
We added some no-sew curtains and attached them with Velcro for a farmhouse kind of look. I also put my new area to good use making some breads and such. The dough really loved this area in front of the window but it just didn’t have a good flow to the kitchen.
The different direction of the grain on the shelves was about to drive me crazy too:
Then when I was writing a quick post I had another idea pop into my head. The next day I did this:
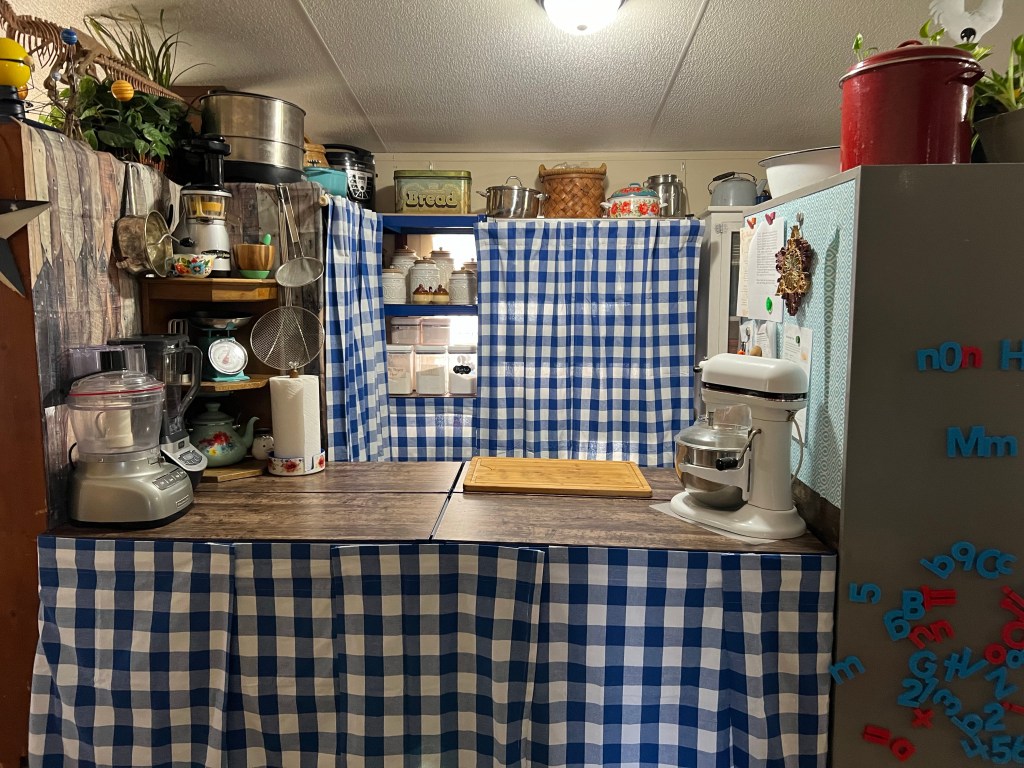
I thought I was in love and I did keep it like this for a whole day but then we had some company over. I hated that I couldn’t see into the kitchen because the refrigerator was blocking my view. I knew that I could make this even better.
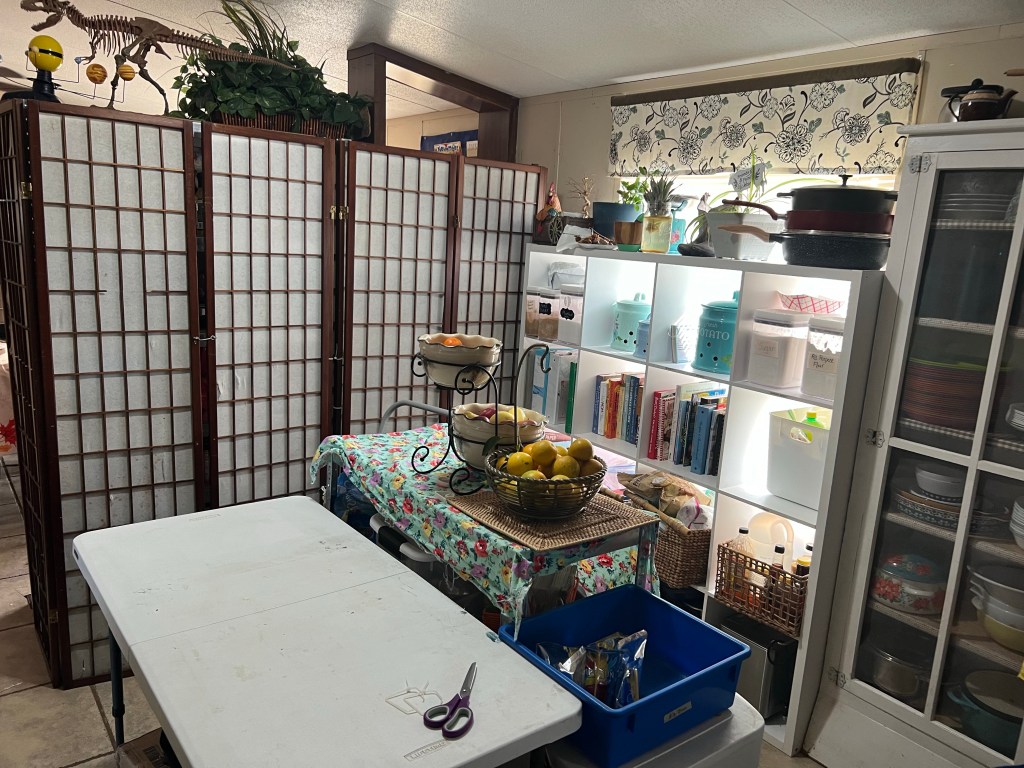
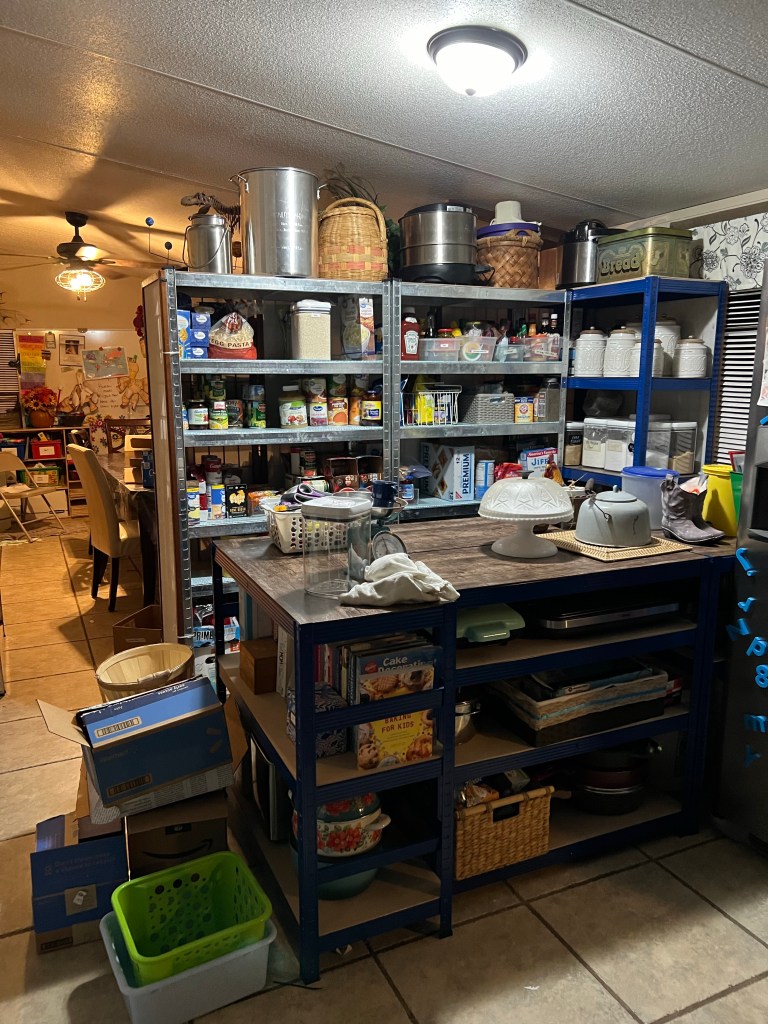
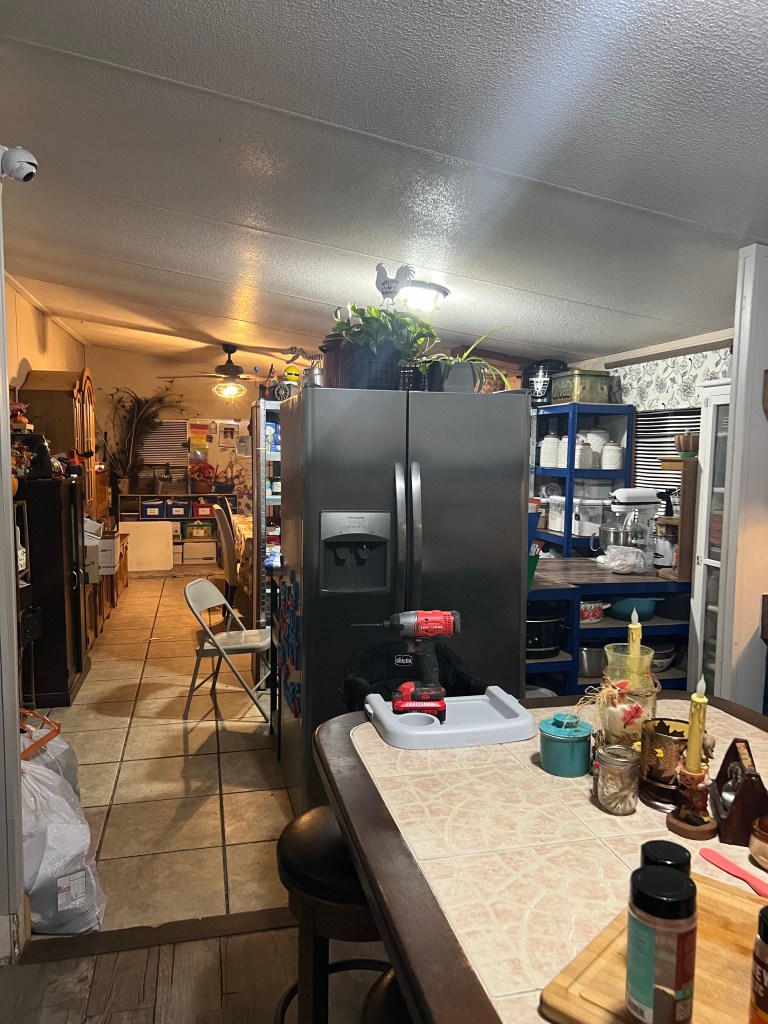
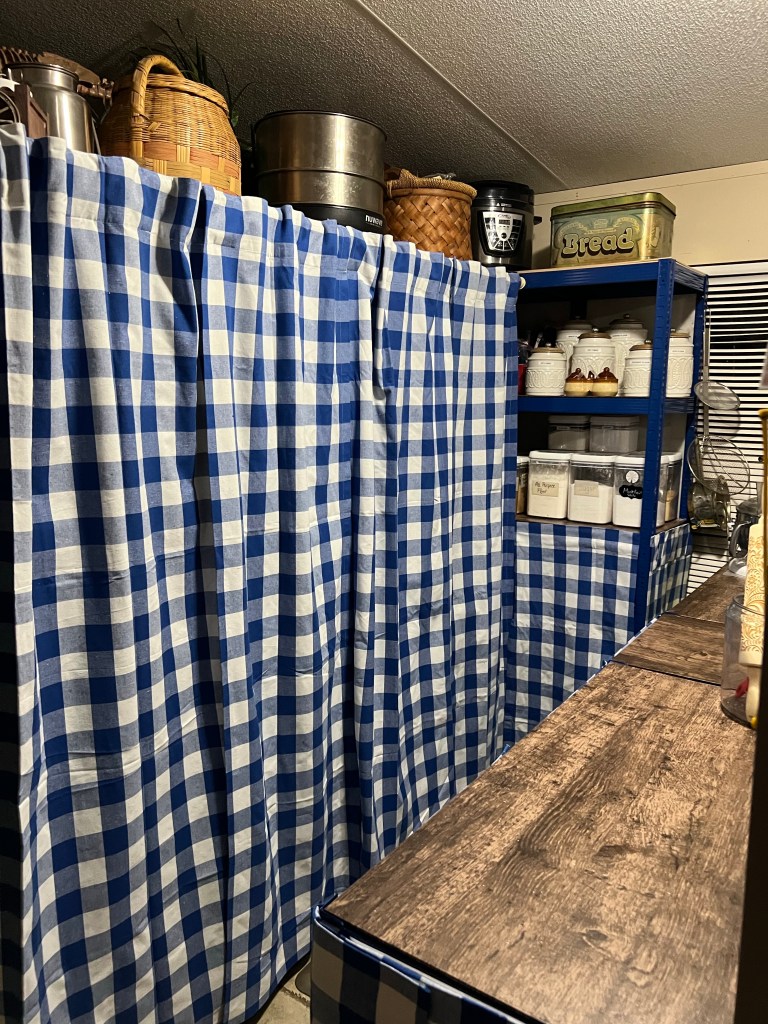
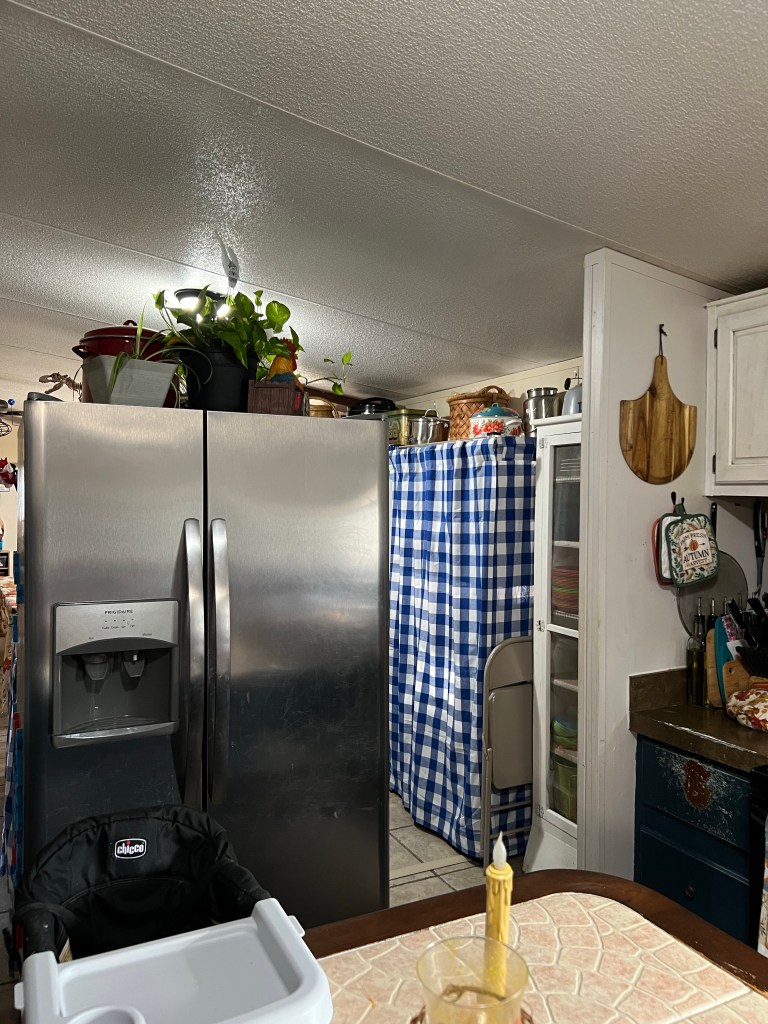
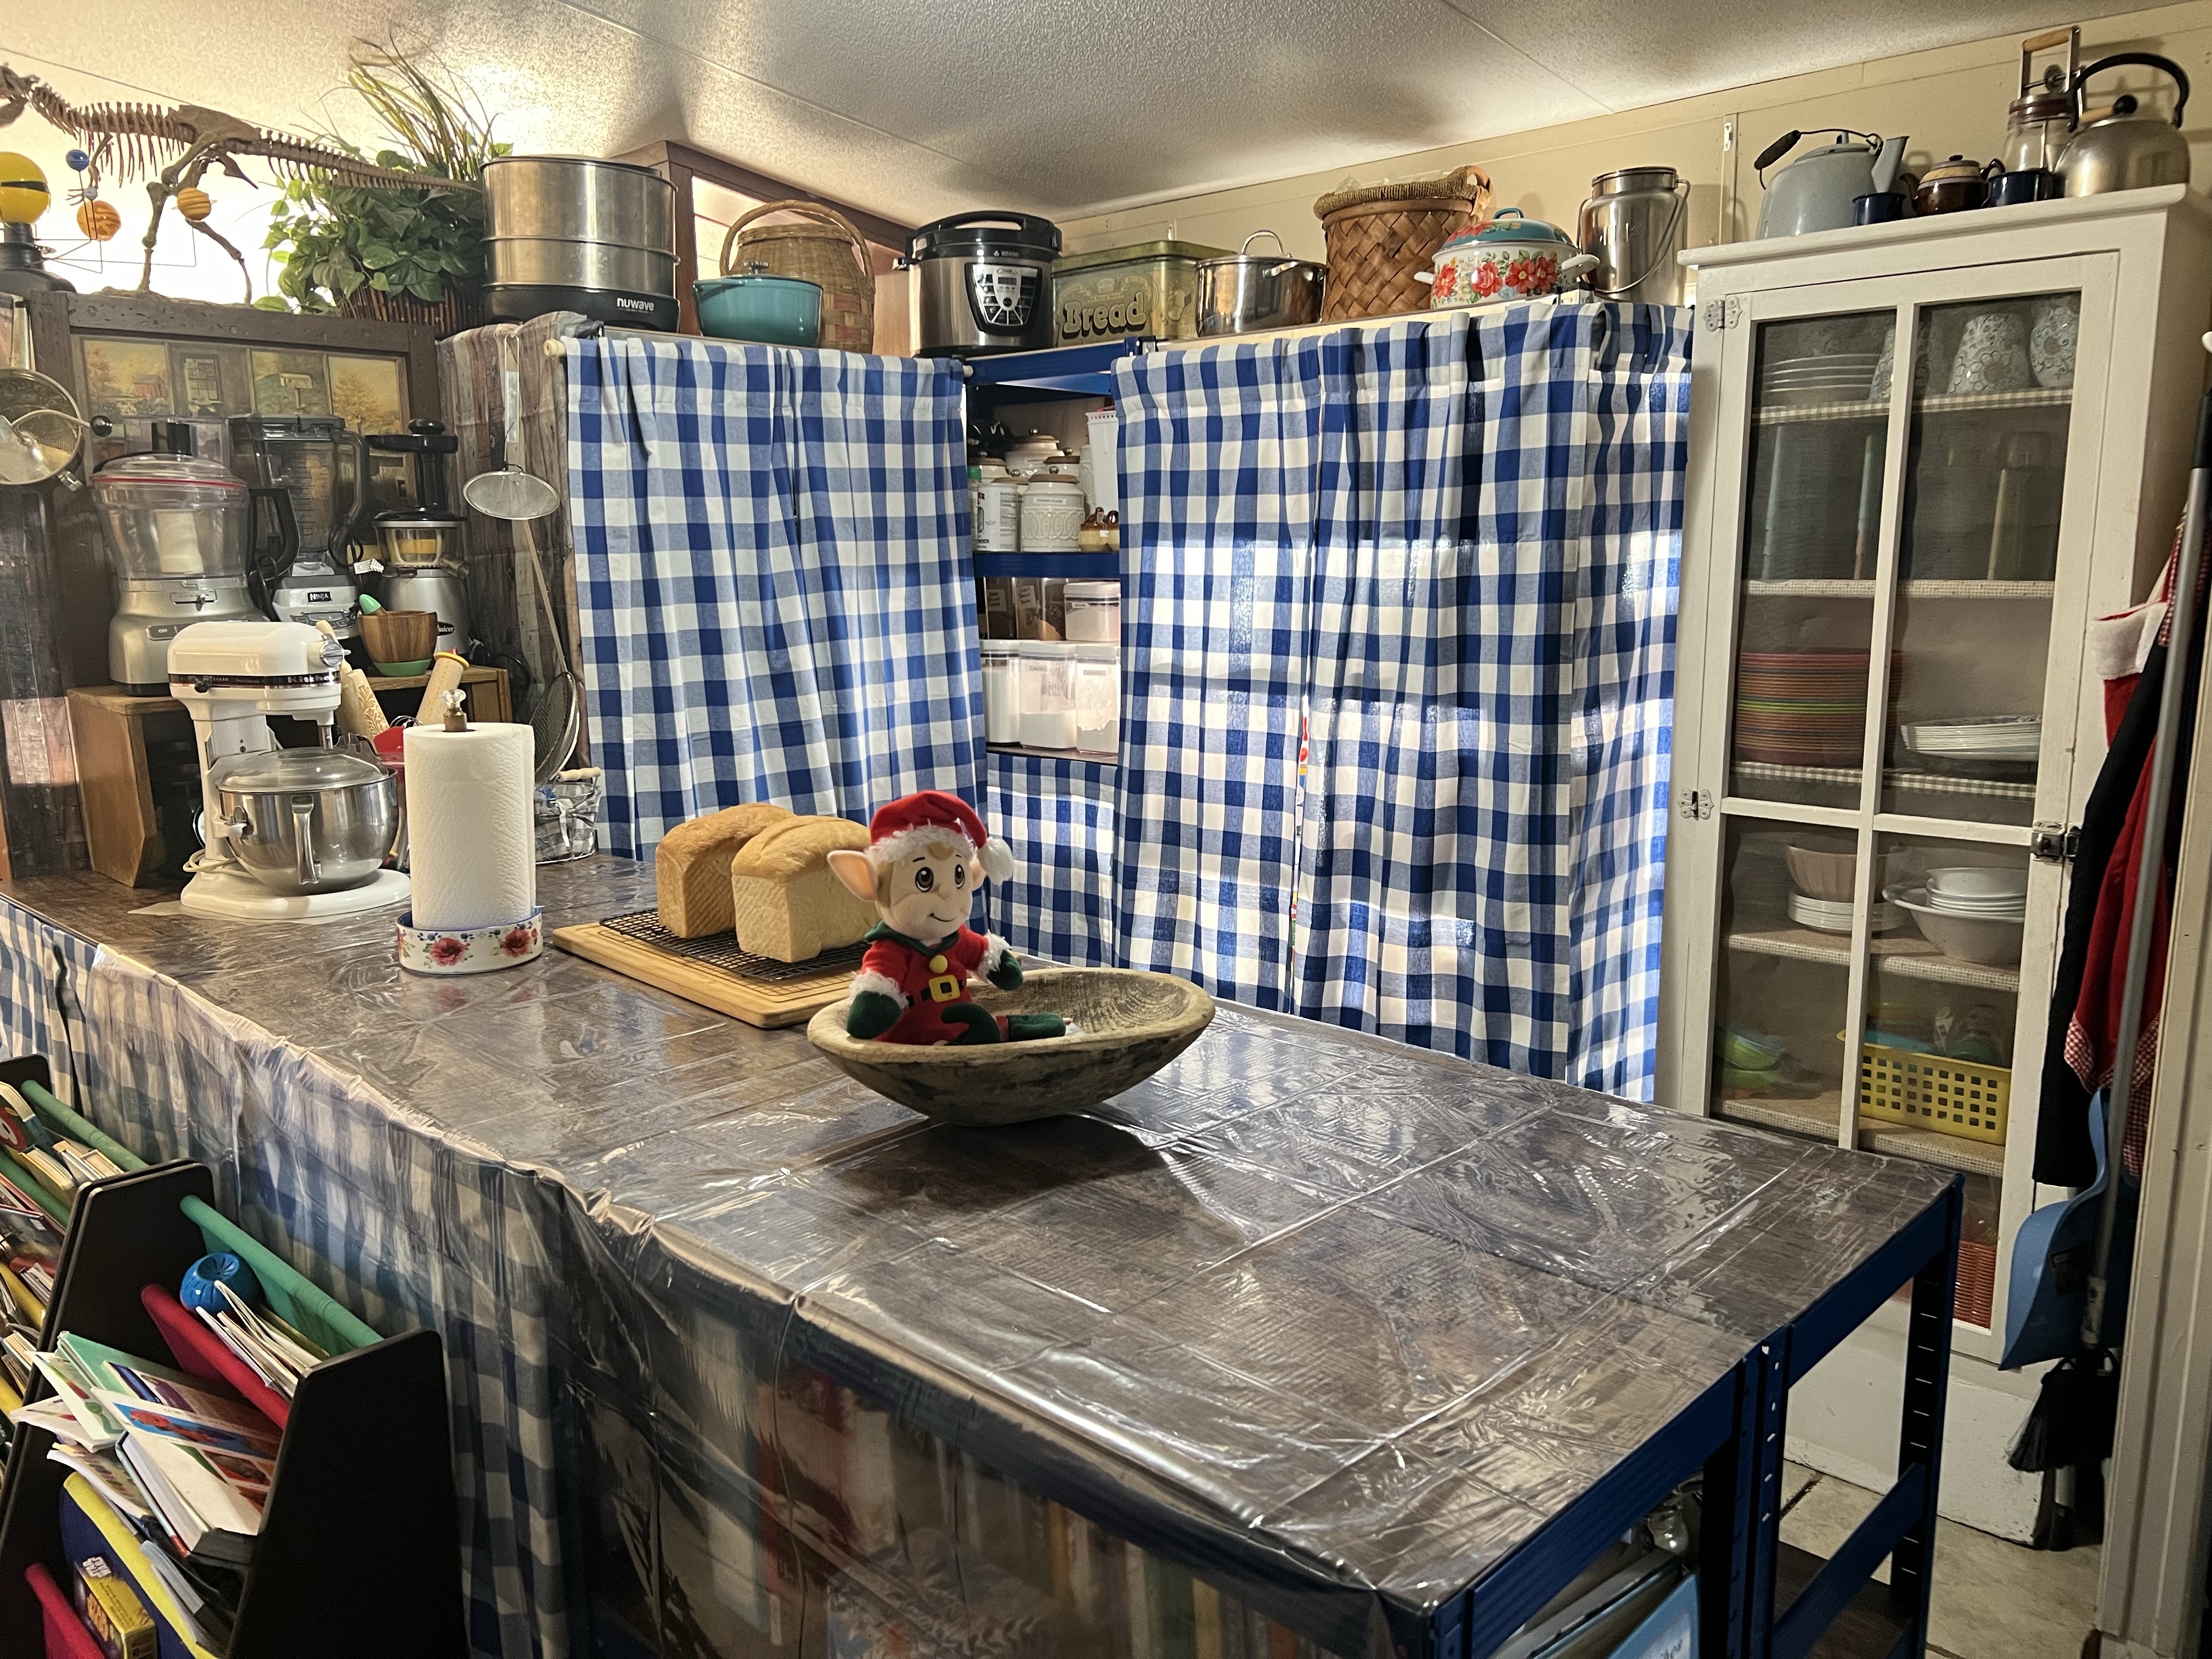
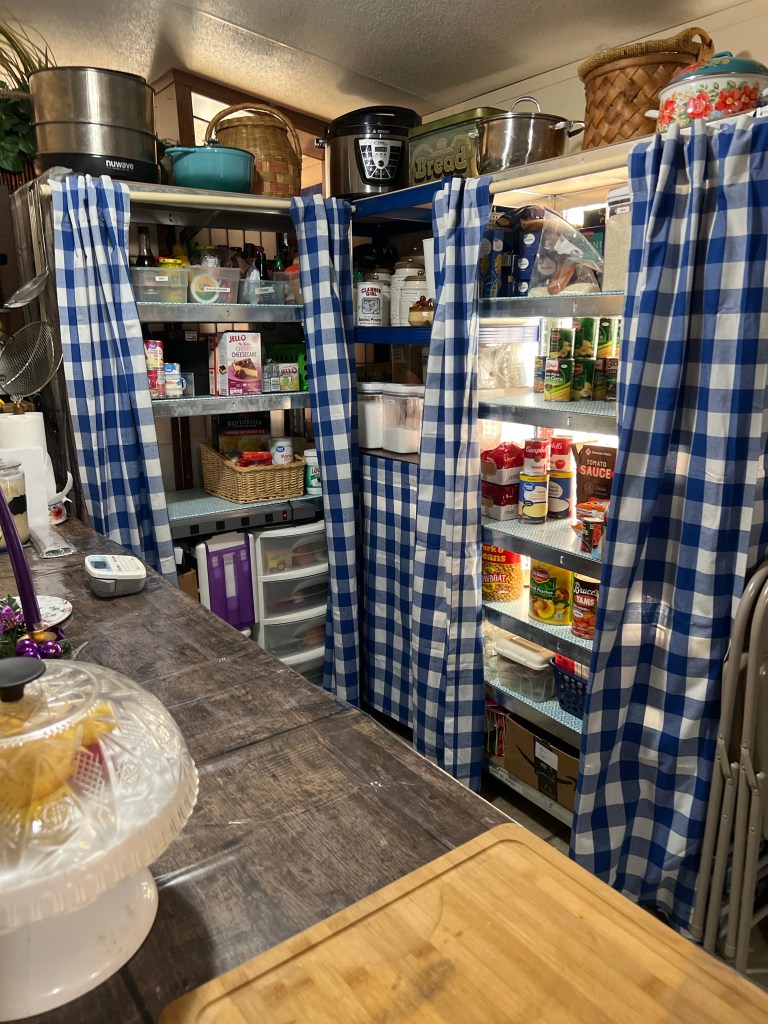
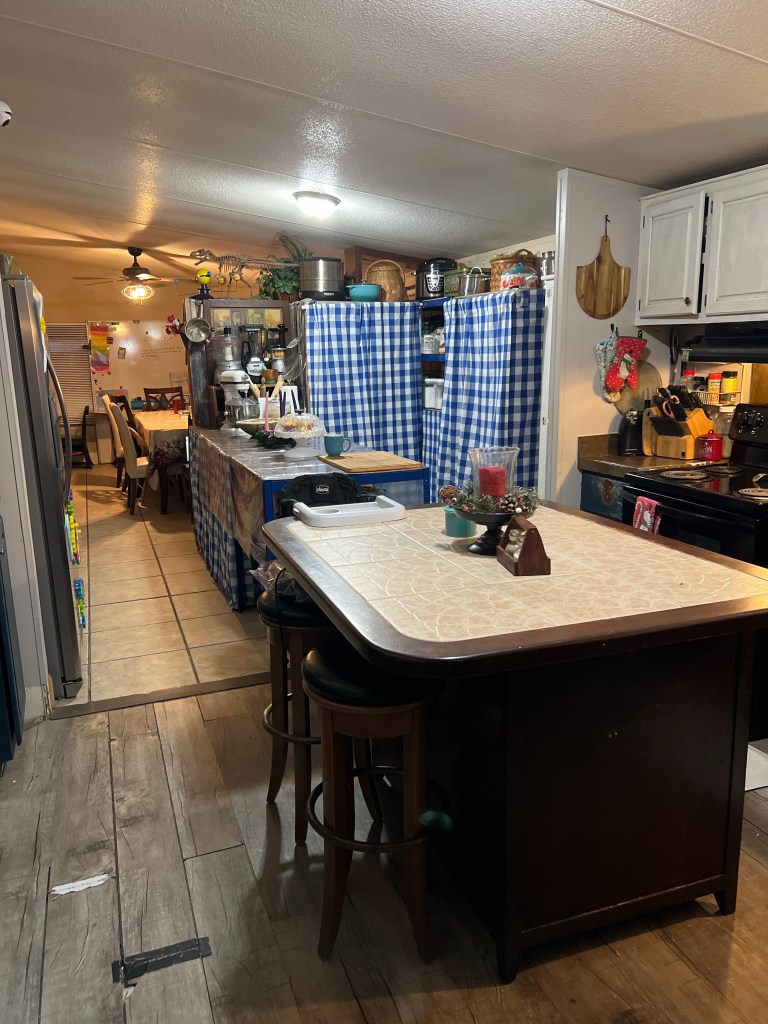
Here is the final result:

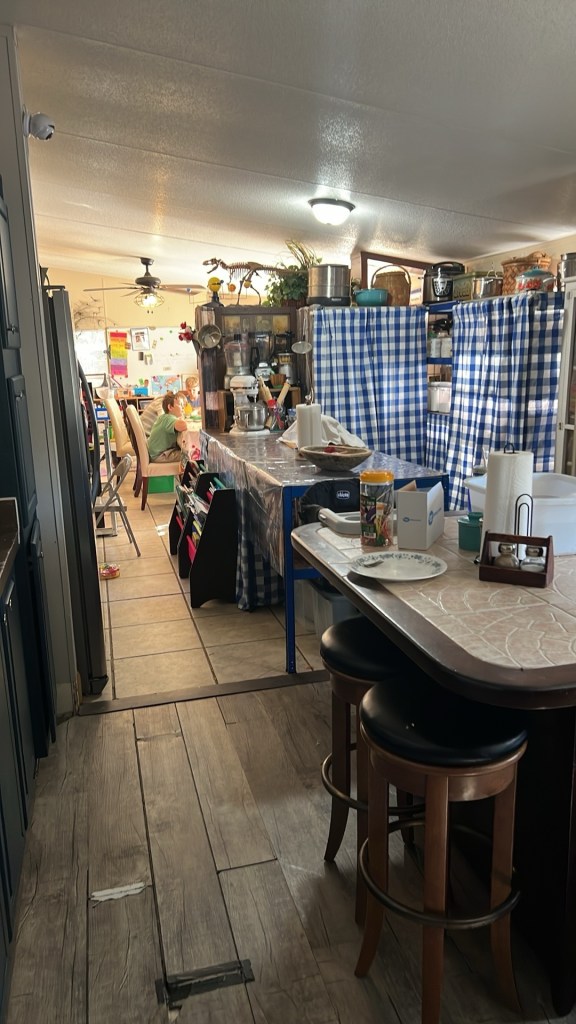
This configuration works great! We now have two islands in the kitchen and I have a clear view of the kitchen and I can see a good way into the living room… so much better! We did move the two little bookcases to the living room.
A couple of things:
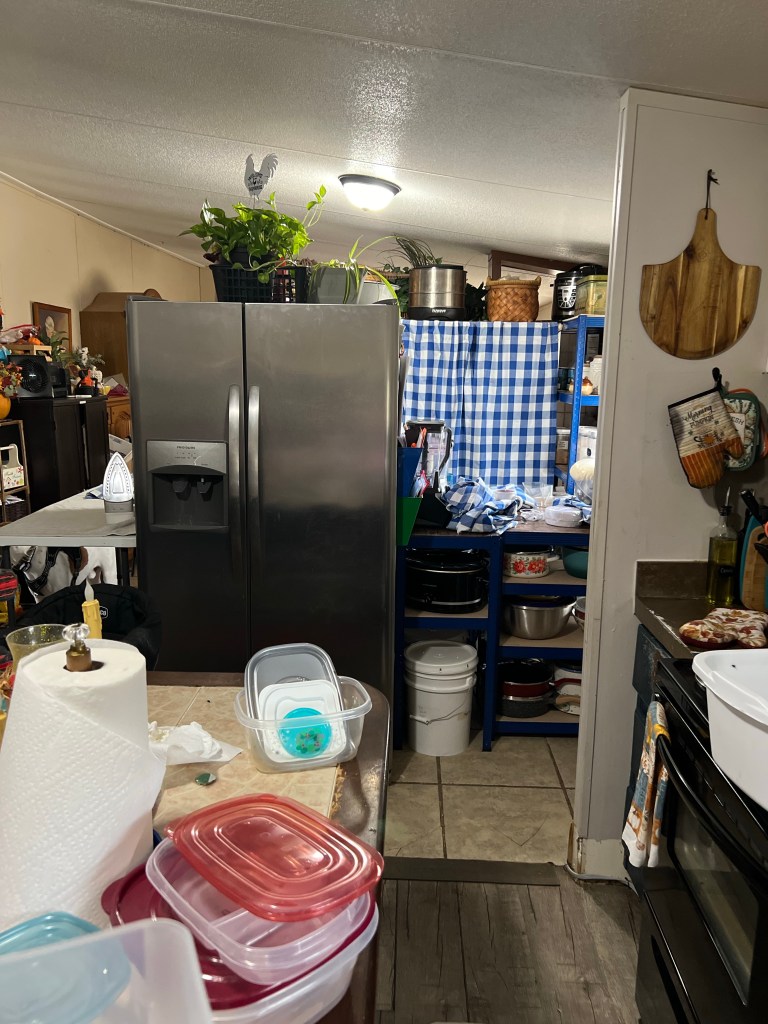
- Yes, I know I covered a window. That was the only way to make this happen and eventually, we will uncover it when we redo the kitchen and make a ‘real’ pantry.
- Yes, the refrigerator went right back to the place I disliked but it works out better now so I’ll be ok. I now know that is the best place for it and my sore muscles might help me remember that the next time I get the urge to move things around.
- No, this isn’t for everyone but it works for us right now until we can afford to do better. I can see many buffet-style meals laid out on these counters and hopefully a lot of fun memories on these.
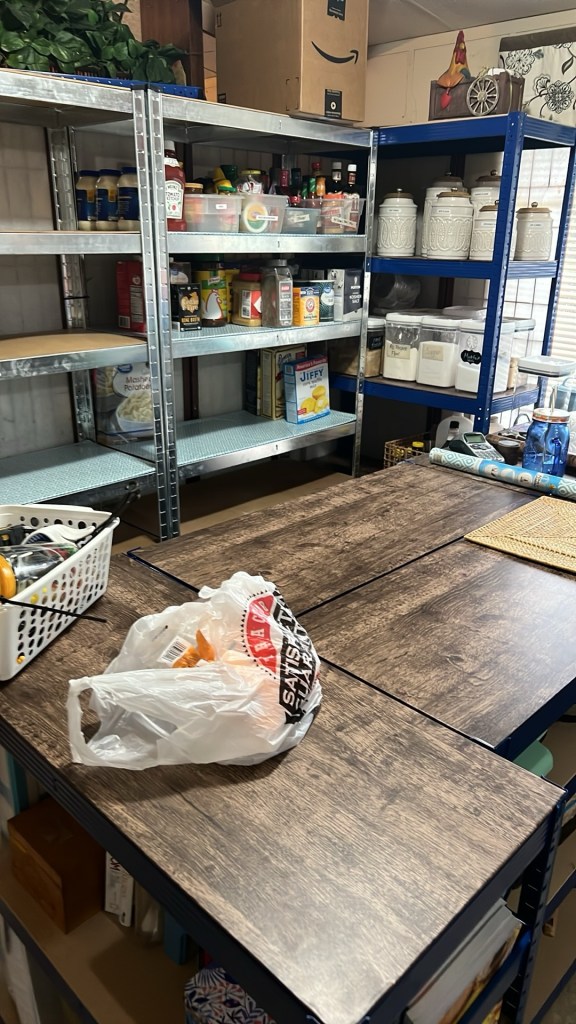
Mr. Awesome is going to make a wooden countertop to go over these shelves and we might even make it so that we can sit at the island. For now, we just have a plastic tablecloth over the top to keep spills and such from getting down between the shelves. When he makes the counter top I might see if he can make me a little appliance shelf for the end of the cabinet where I kinda stacked them up.
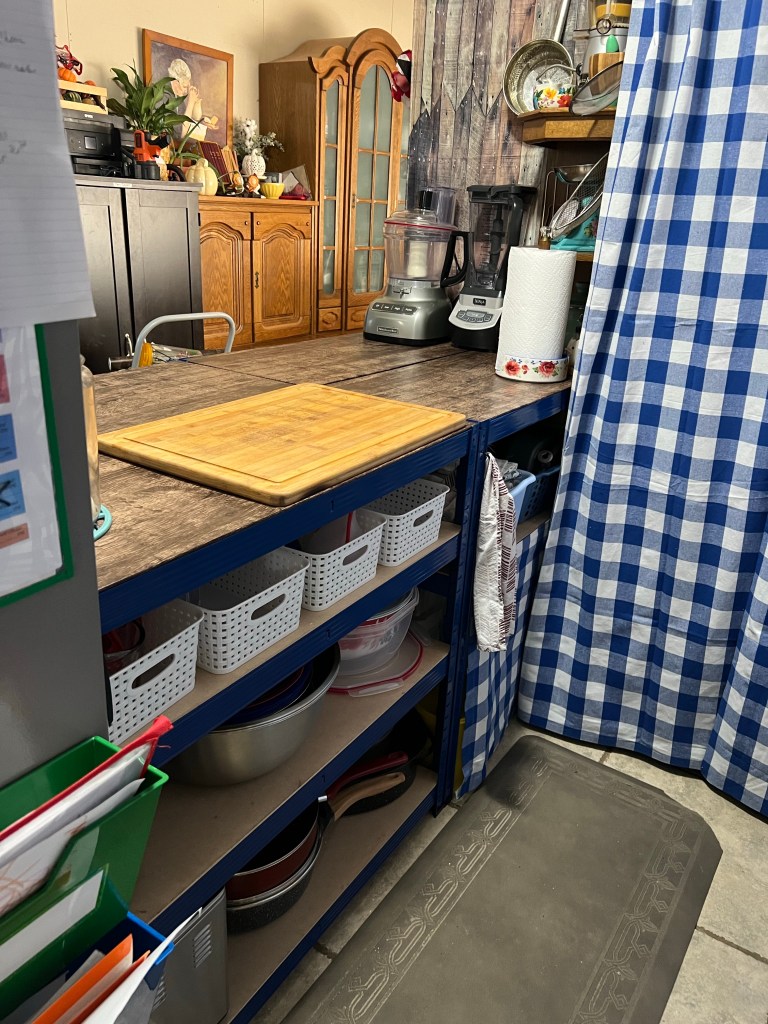
The island is actually 3 of the shelf kits that I made into half shelves. These are the perfect counter height for me!
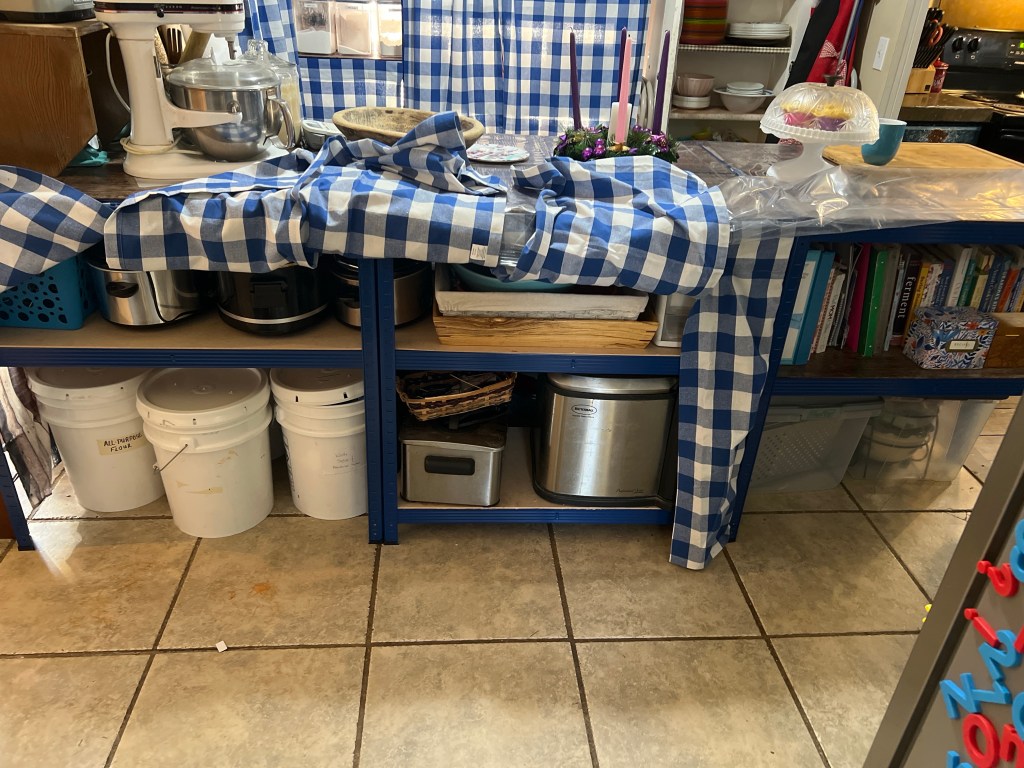
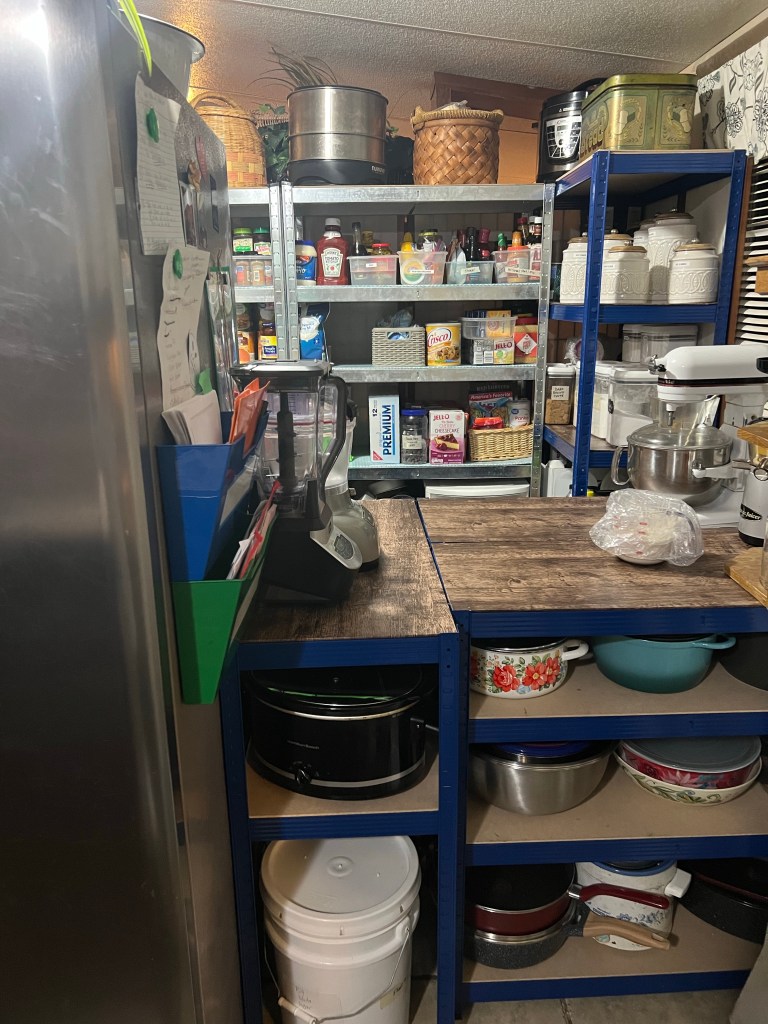
On the outer side, I configured them to have a place to put our buckets that hold the bulk supplies of flour and such. The crockpots fit nicely on the shorter shelves. I also have my fryers and a few larger trays on the outer shelves as I won’t need them much. One shelf has the majority of my cookbooks – I really need to declutter a few and quit buying more but I love old cookbooks!
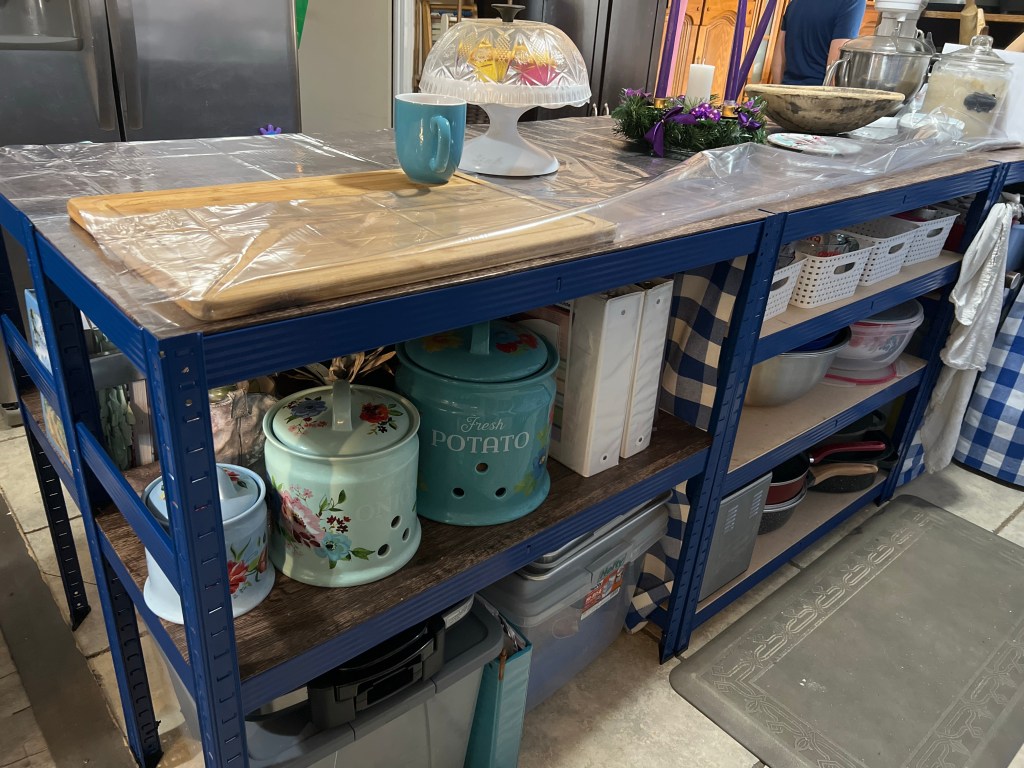
On the pantry side the shelves closest to the ‘cooking zone’ hold the garlic, onions, and potatoes plus a few extra binders with recipes and pdf cookbooks. There are a couple of totes underneath to hold the grilling supplies, extra-large baking sheets, electric griddle, and other supplies.
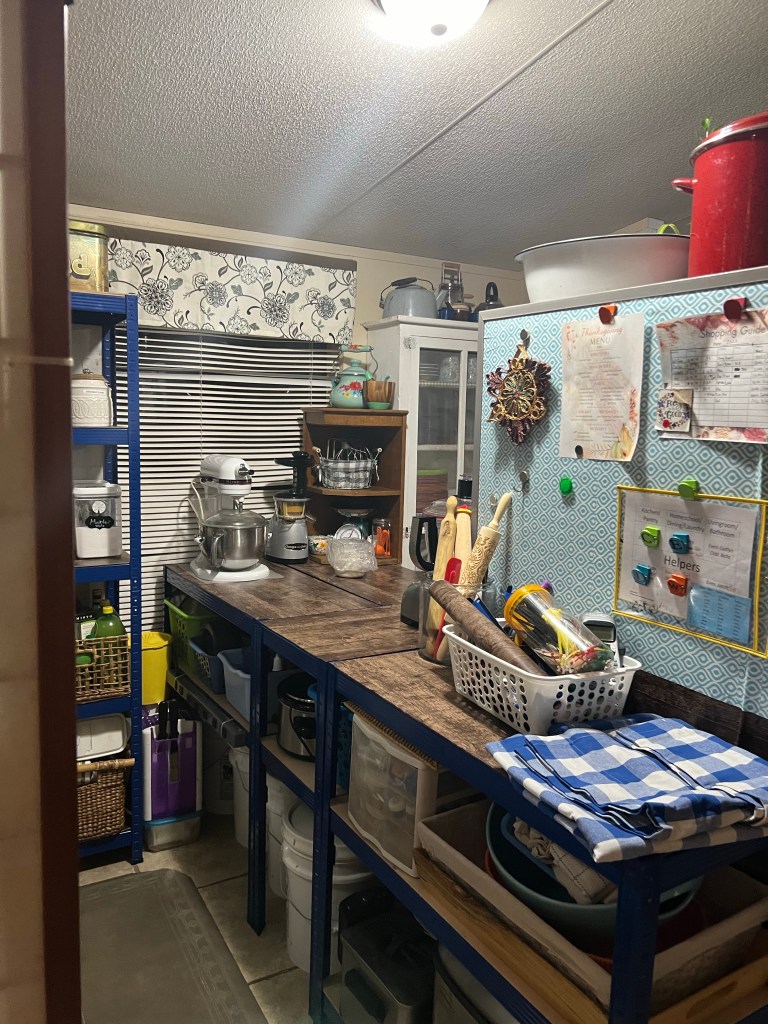
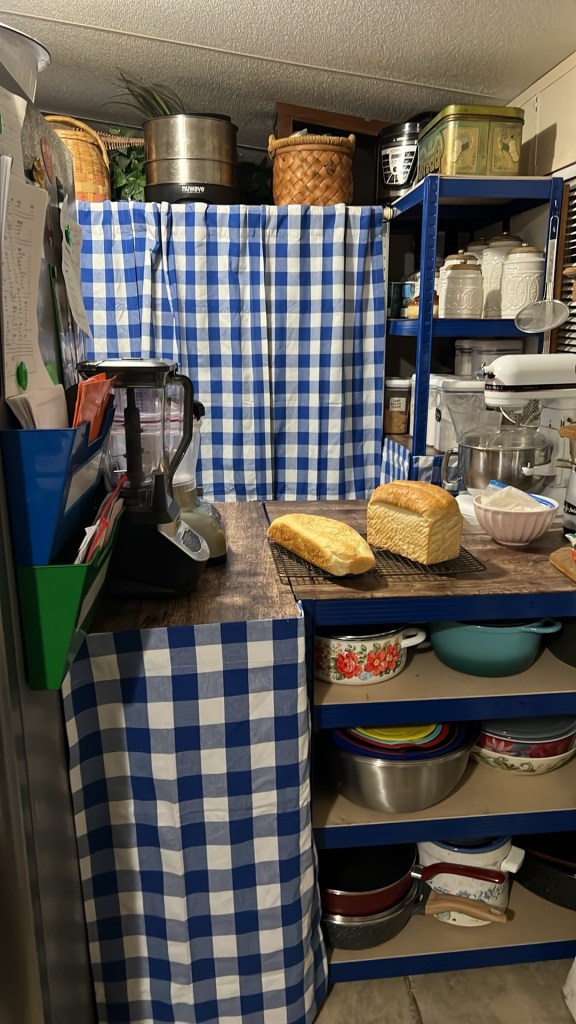
In the ‘baking zone,’ the white baskets hold the extra measuring cups and measuring spoons plus some baking supplies like pastry cutters and such. Underneath these baskets are the large mixing bowls, a larger crockpot, and then some of the larger skillets that don’t fit in the cabinet and the bread maker.
The next shelf over has some more buckets underneath and the top shelf holds the bread towels, smaller rolling pins, our old popcorn maker, and the attachments to the mixer and small appliances.
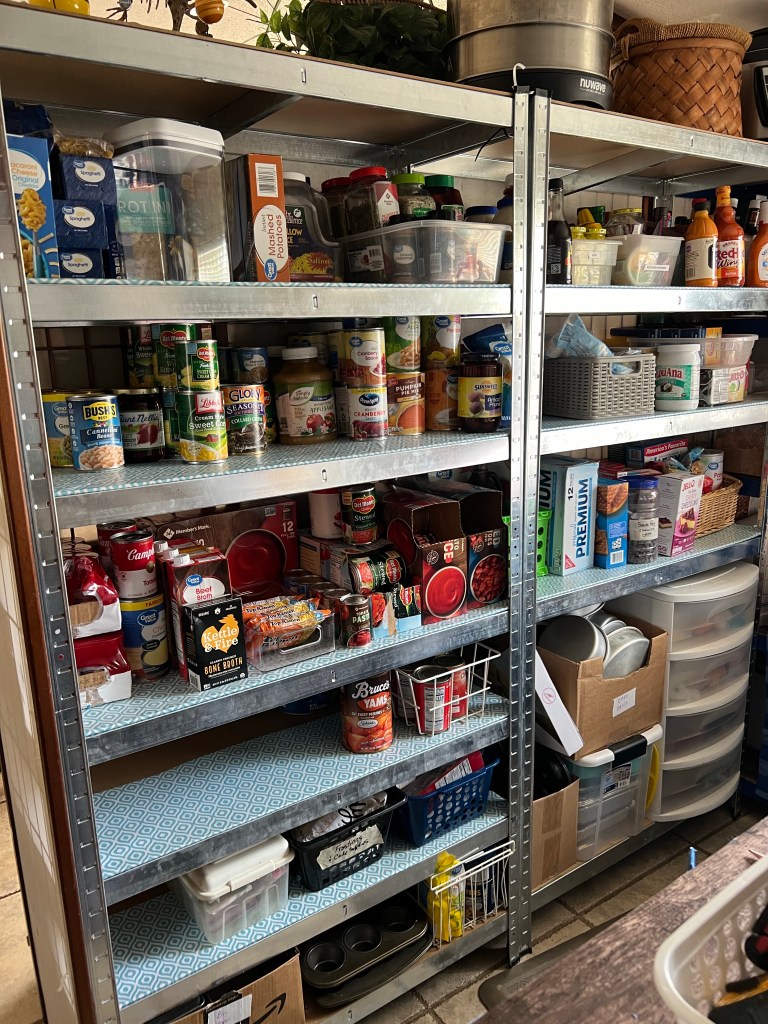
The pantry shelves are the older silver shelves that I had. I need to restock and finish labeling them. I do have my cake baking and decorating supplies towards the bottoms of the shelves as well as the muffin pans and loaf pans. I used an old set of plastic drawers to hold my canning/pickling supplies, small mixers and gadgets, cupcake liners, and other decorating supplies. The smaller drawers on the other side of the island hold my food colorings, pastes, and edible glitters and paints. It is easy to lift it off the shelf and set on the island when I need it.
(I used the old divider screens to cover the backs of the shelves so that cans/food wouldn’t get lost behind them. These screens were previously being used as ‘doors’ for the cabinets… held on by zip-ties.)
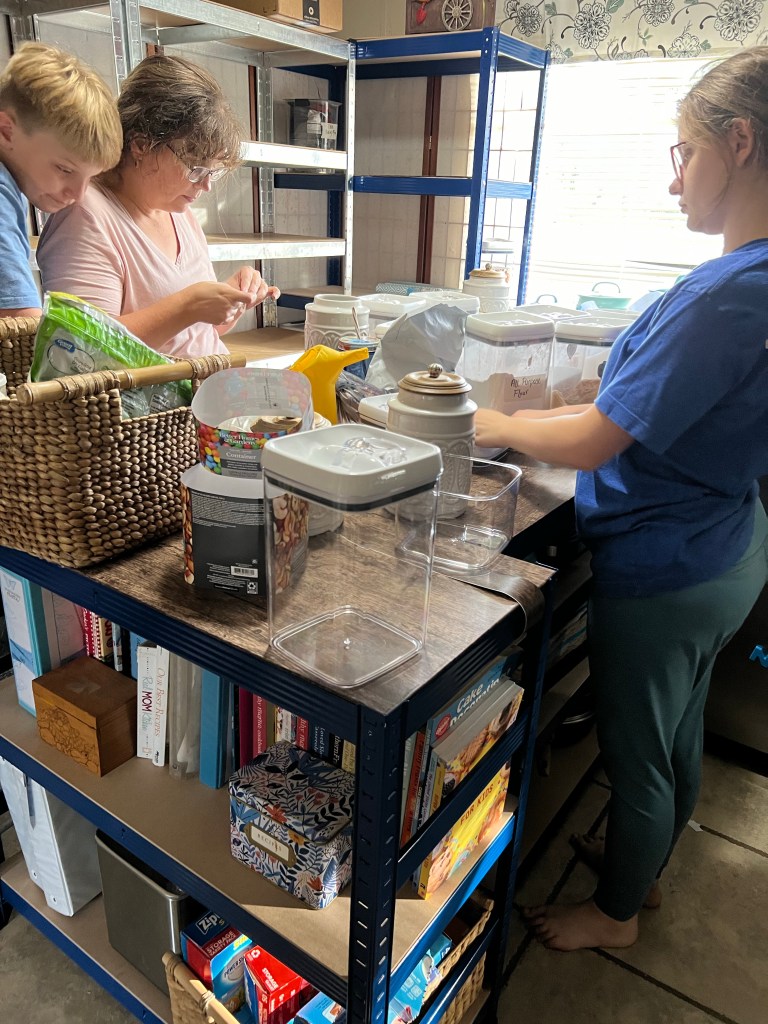
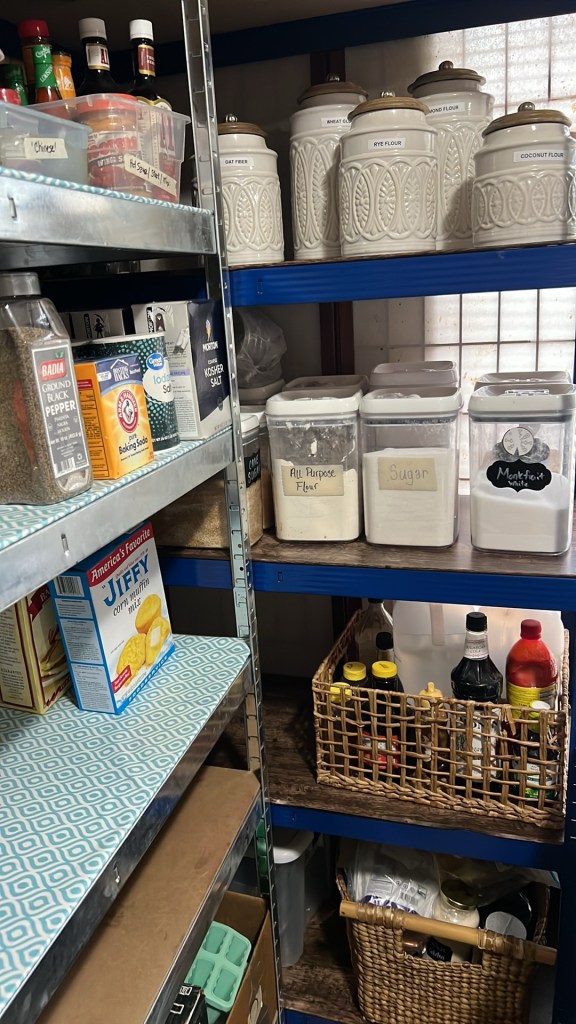
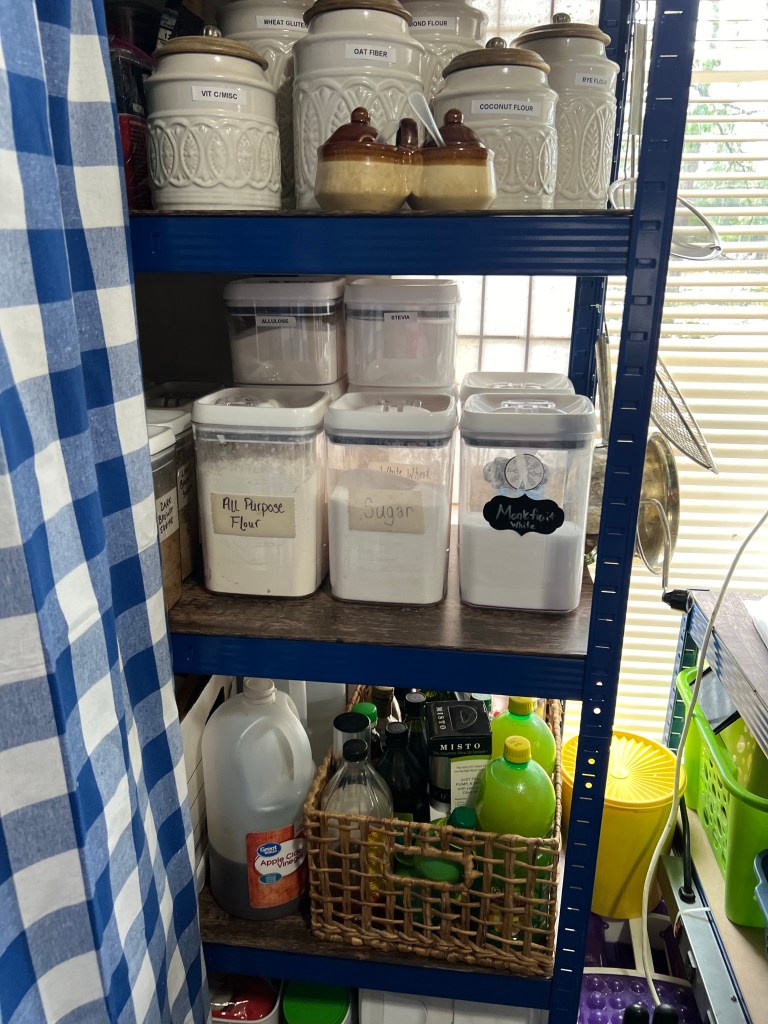
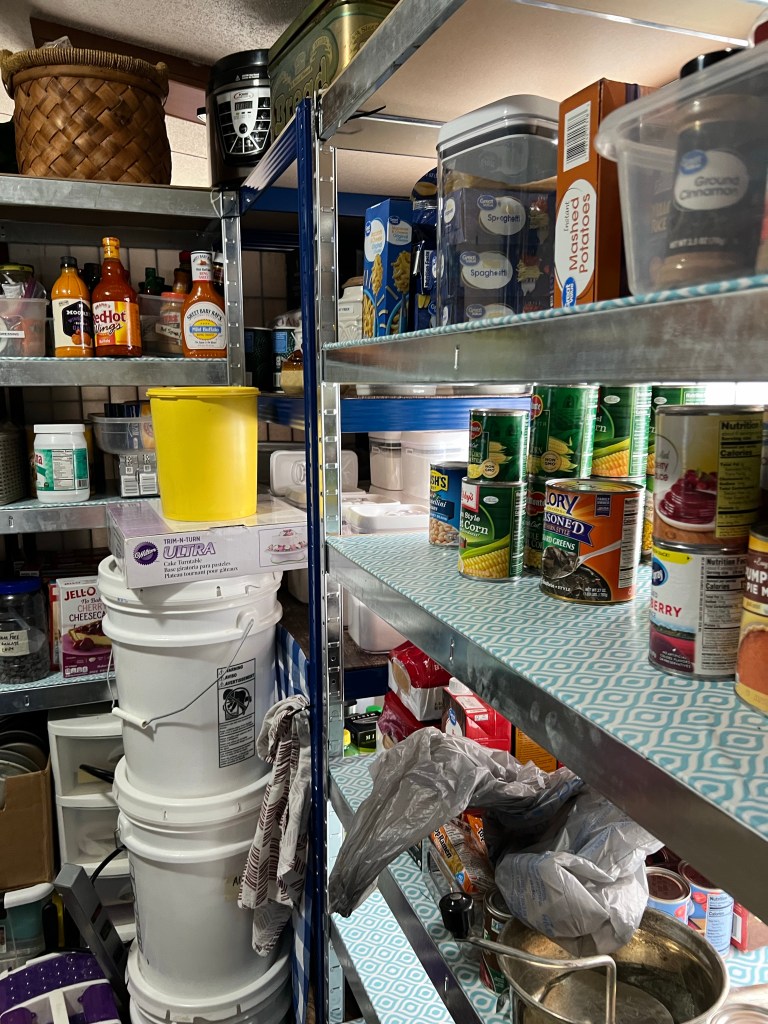
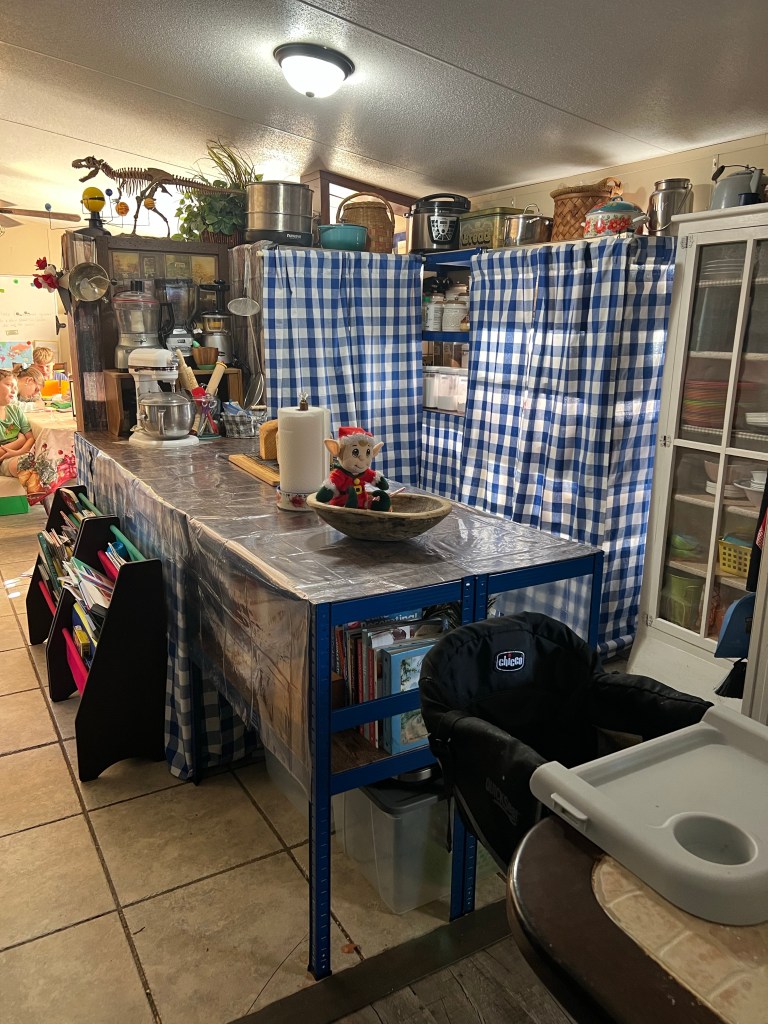
I left the top of the center shelf open as these are items I frequently need. I used some canisters I already had and I bought a few more to keep things looking neat and tidy. I forgot to open the curtain under the baking supplies but I have a couple of baskets with Trim Healthy Mama supplies, oils and vinegars, and other miscellaneous kitchen things that we don’t need all the time.
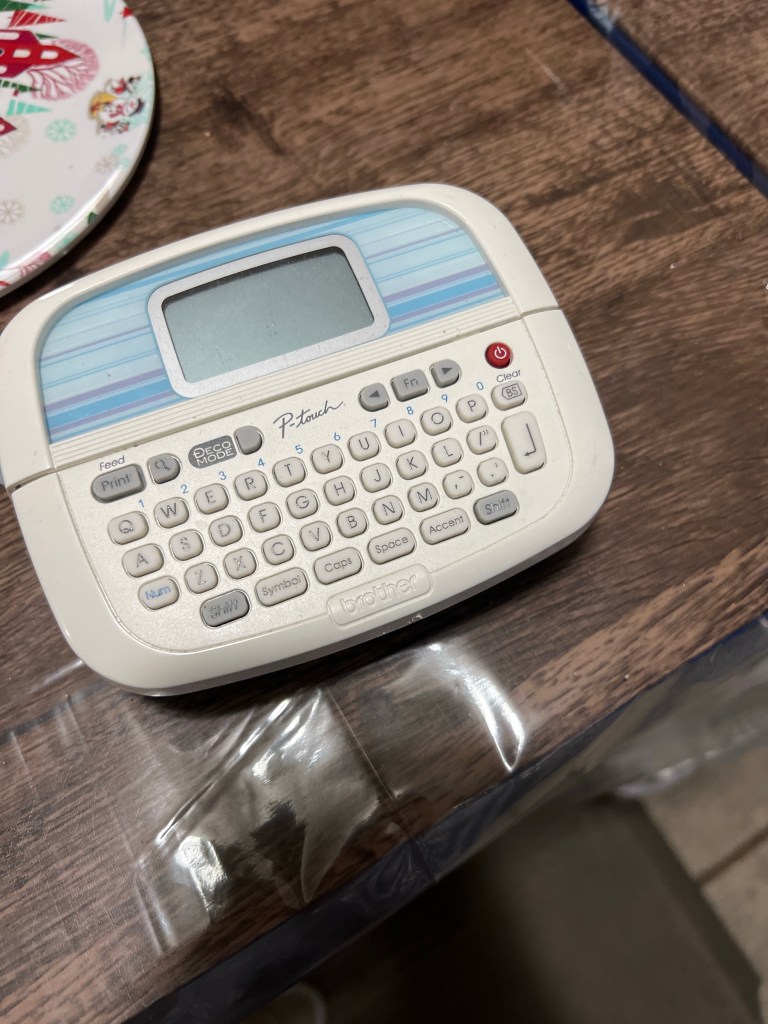
I was using a Dynamo label maker but it gave out on me so luckily I had this Brother label maker hanging out in a drawer.
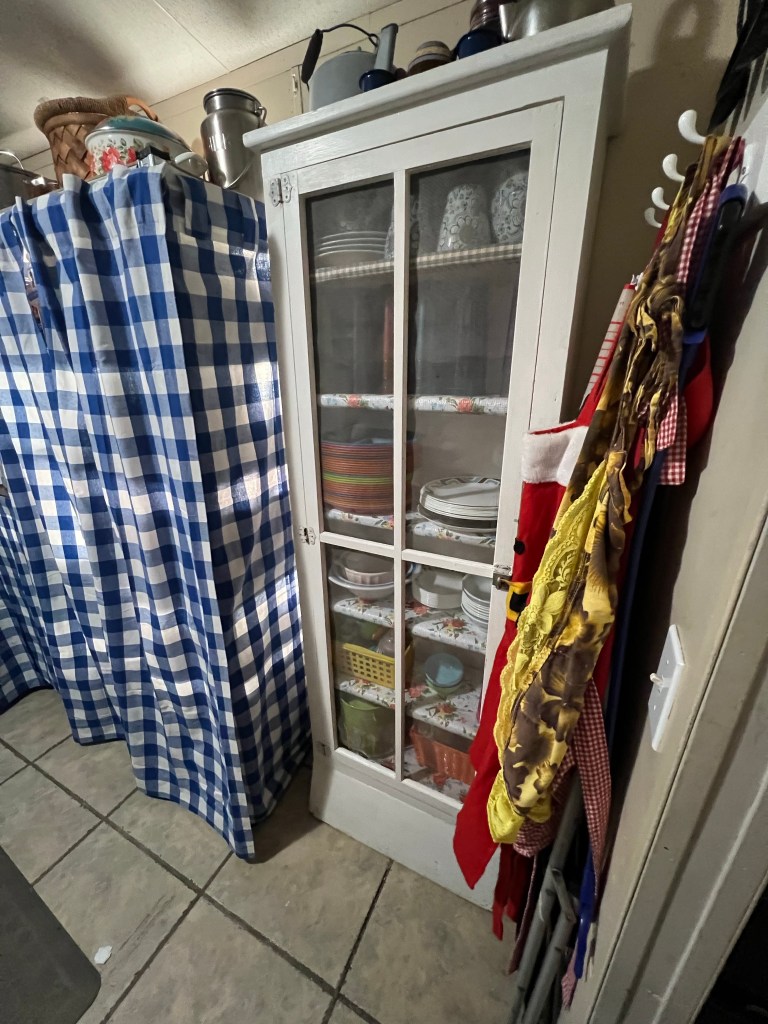
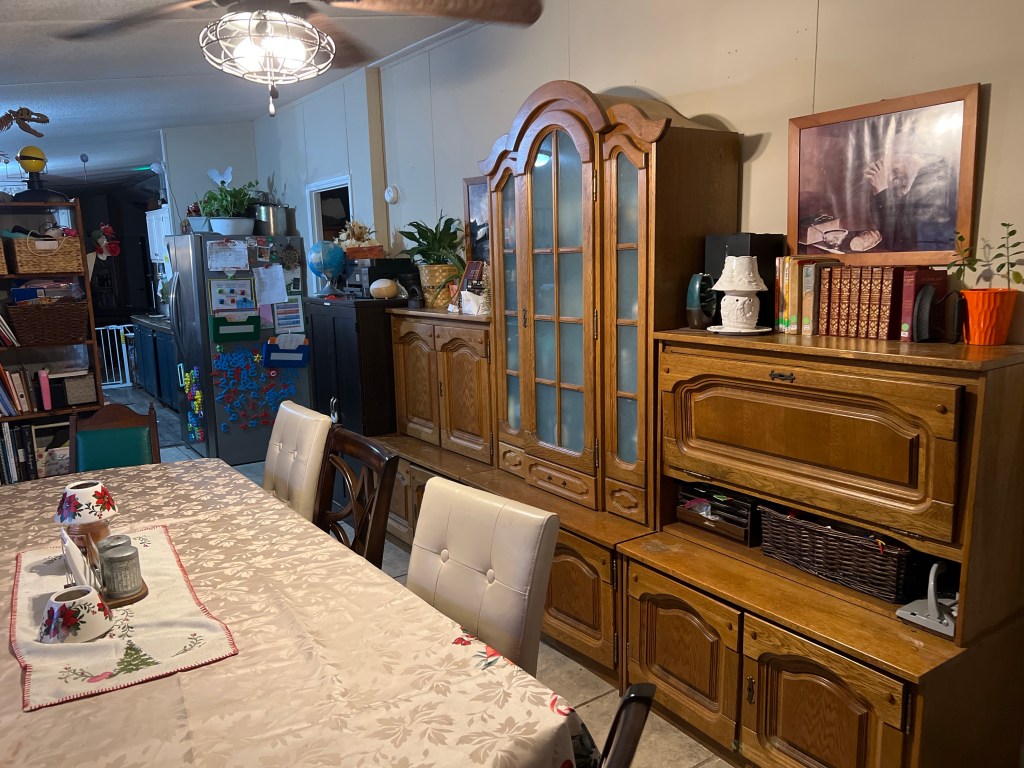
As you enter the pantry area we have our dishes and a place to hang/store our aprons, broom, step stool, and a couple of extra folding chairs. We made this hanger when we moved in here.
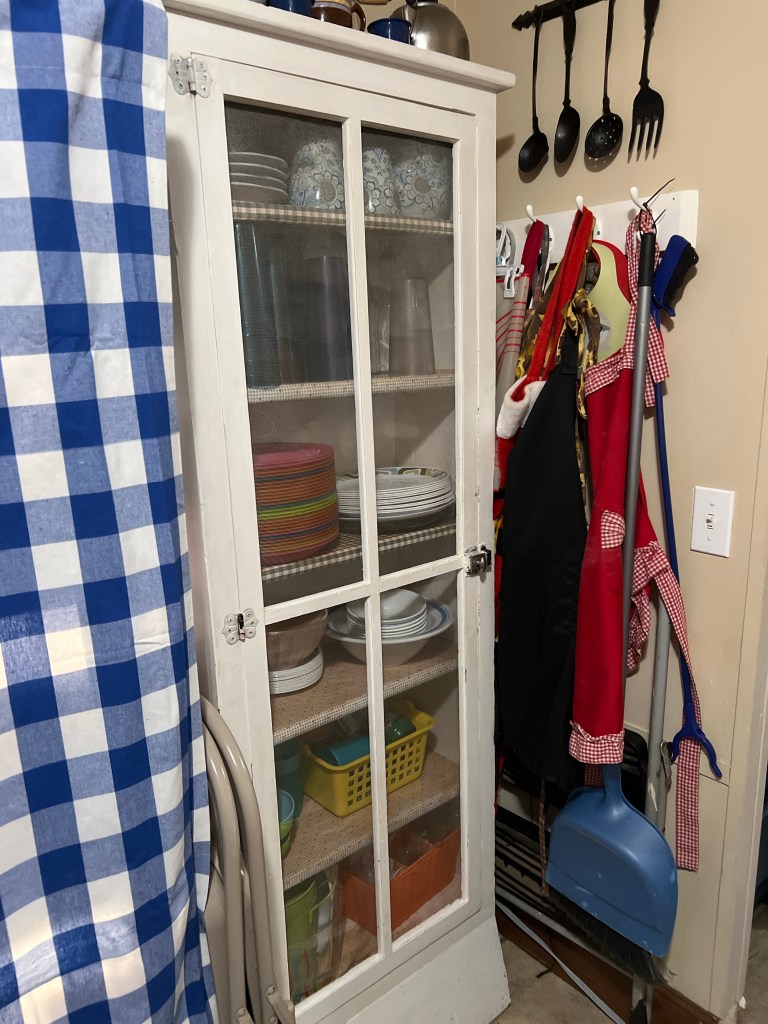
We keep our ‘everyday’ dishes in this cabinet and the bottom shelves hold the baby’s dishes and some items that we use when we have large dinners. Also, I have some new shelf paper to put in this old cabinet… I just keep forgetting to do it. Mr. Awesome’s Papa built this cabinet many years ago and I love it!
Updated Pics:

This roll did all the shelves except for one so I decided to keep the top shelf with the old paper and it looks pretty cute… I did keep all the old paper underneath the new as well for memories.
I am working on decluttering a few more items to make a little more room for things but this is working so good! I’m so glad to have everything I use pretty often right at my fingertips.
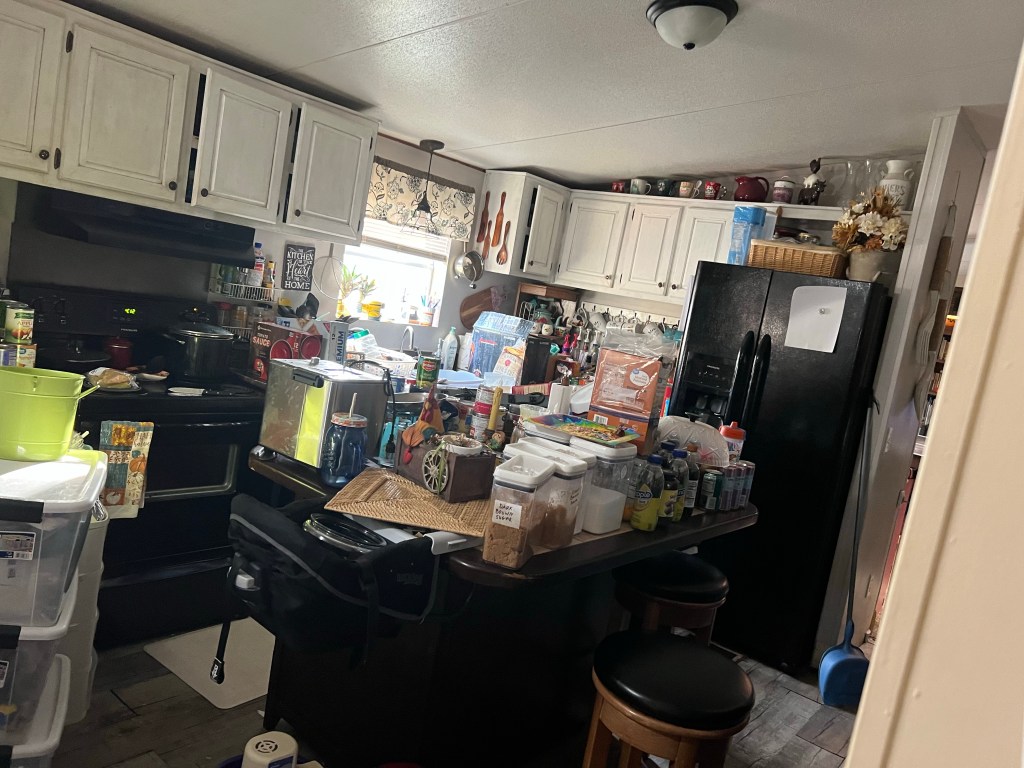
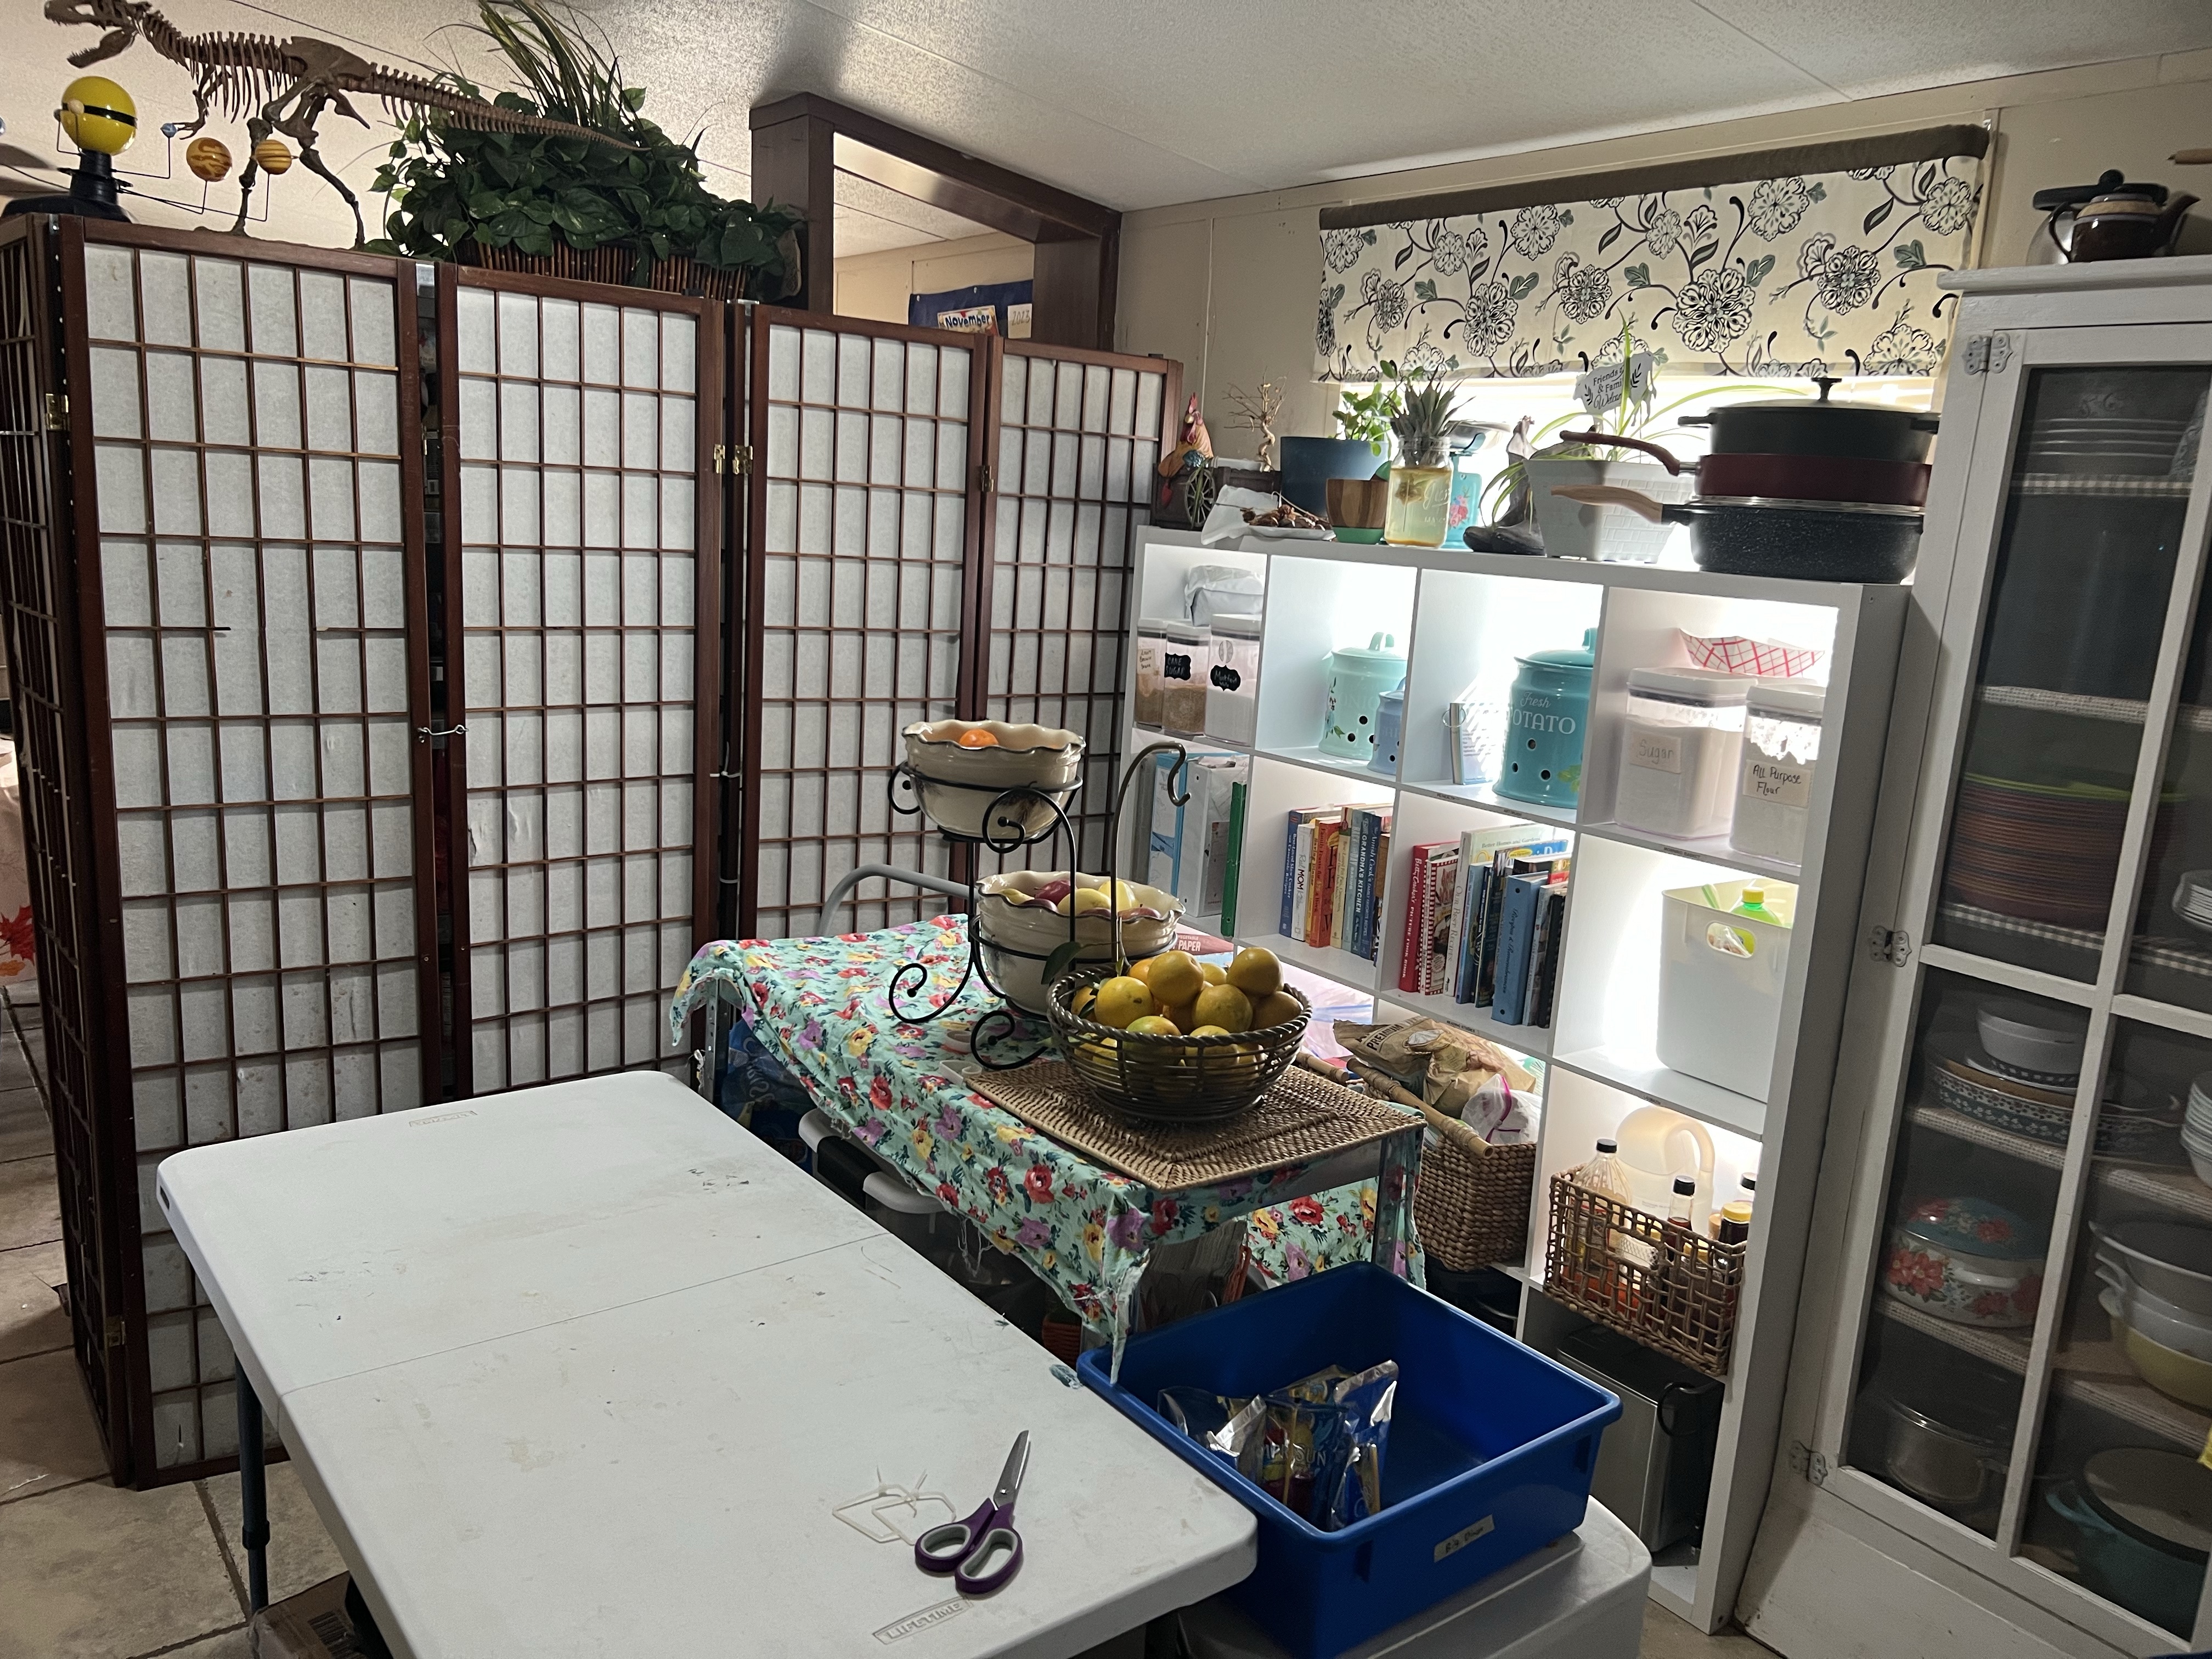
In addition to this makeover, I completely reorganized the kitchen as well. I mentioned that in a previous post but here are a few pictures of what we did:
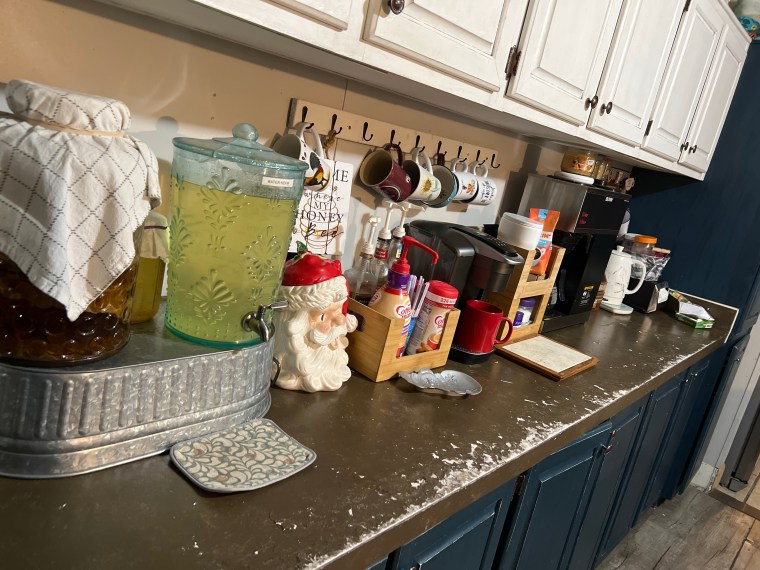
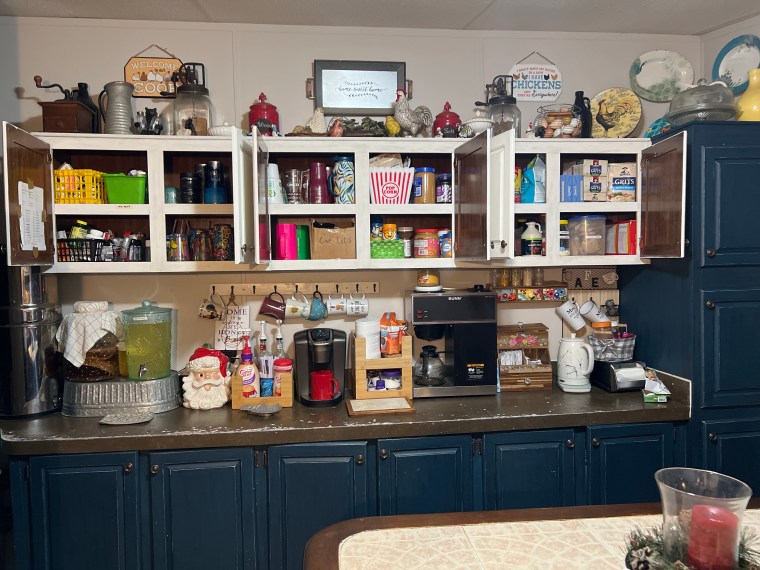
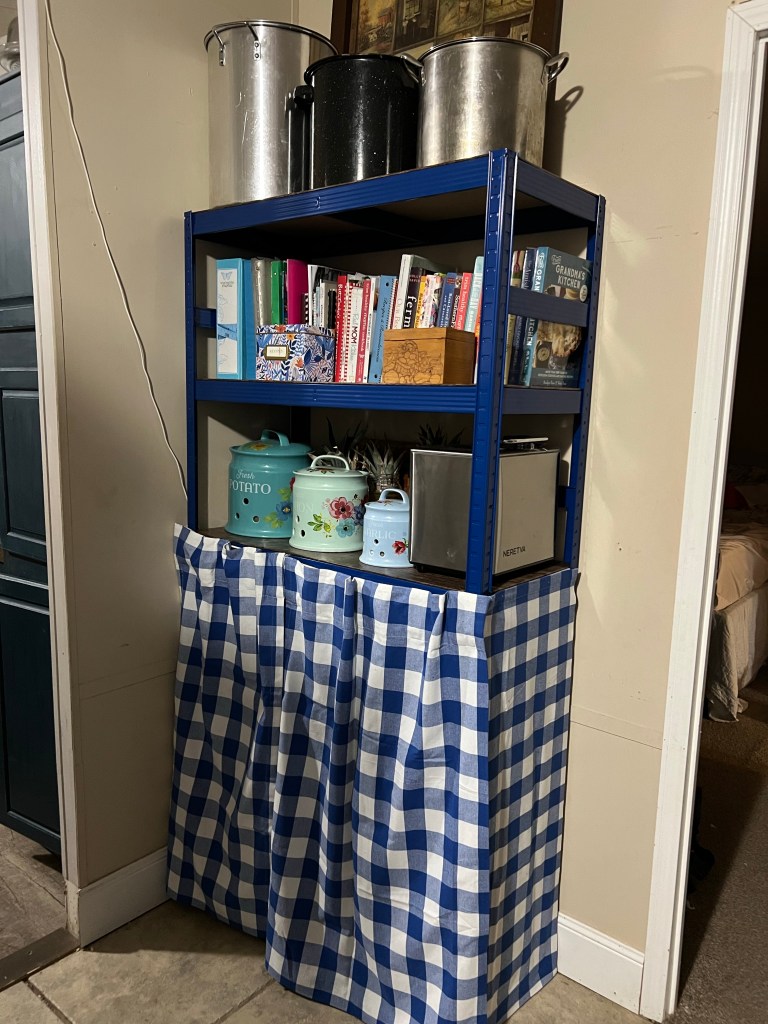
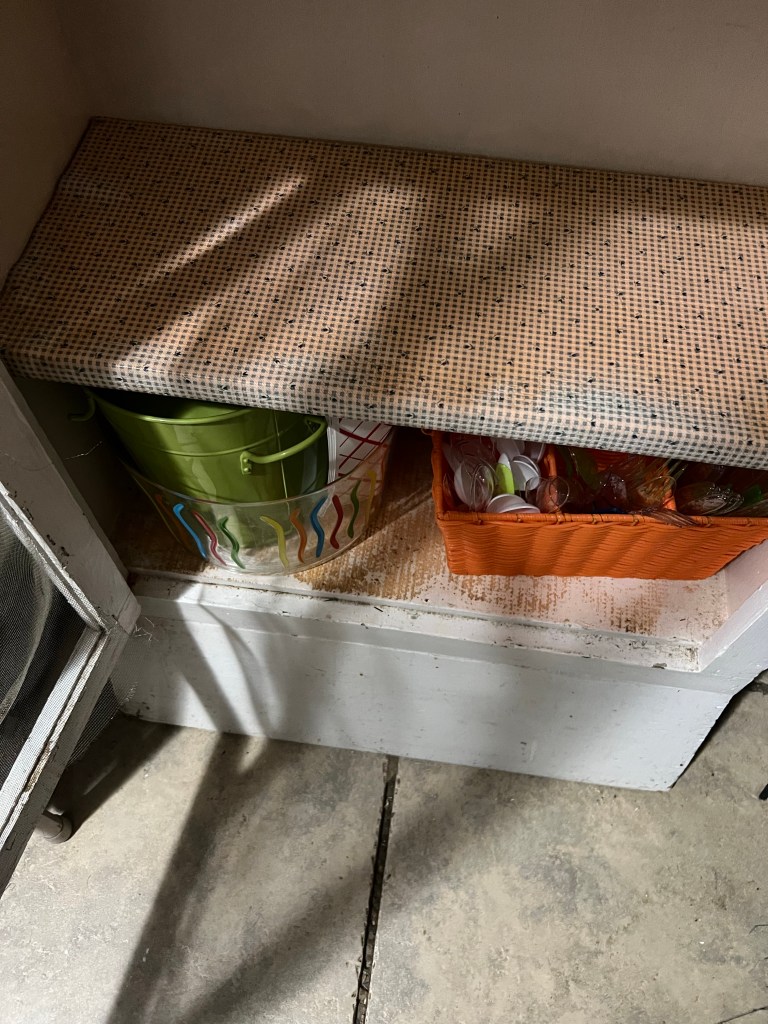
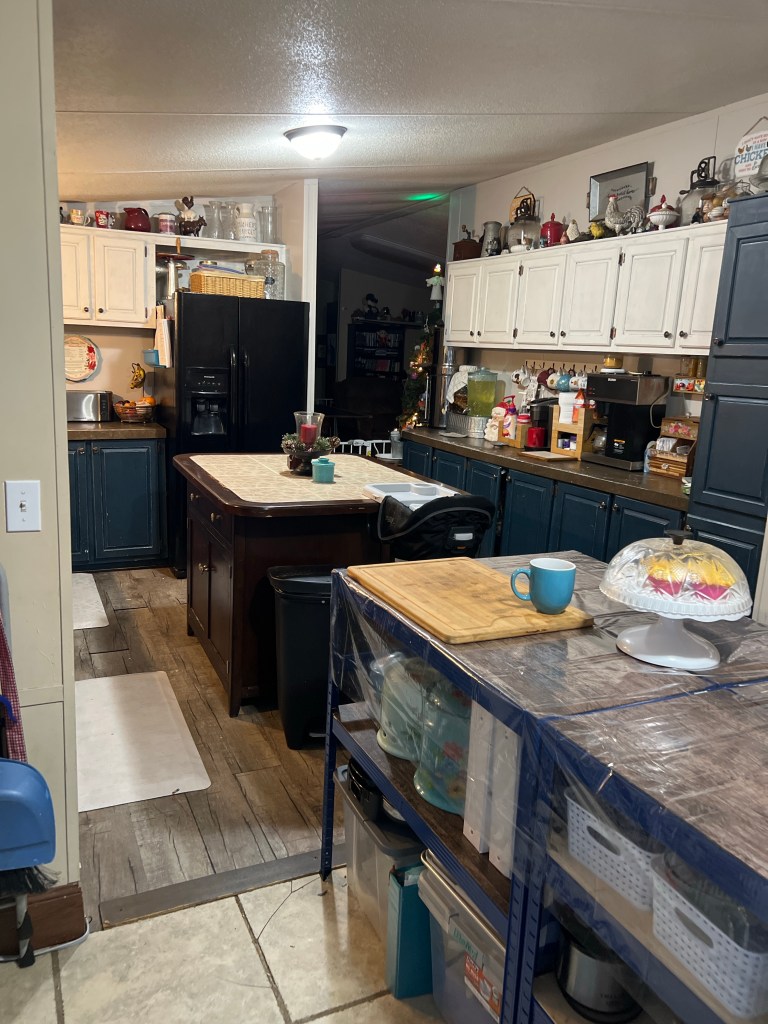
You can see that we have a ‘Beverage/Breakfast/Snack Station’ set up in this picture. The most used supplies are on the counter and/or the lower shelf. Bulk supplies are in the lower cabinets along with the cups that the kids use for their hot cocoa and tea. This has been working out really well.
The lowest shelves hold the items that we rarely use such as cake savers, serving trays, and such.
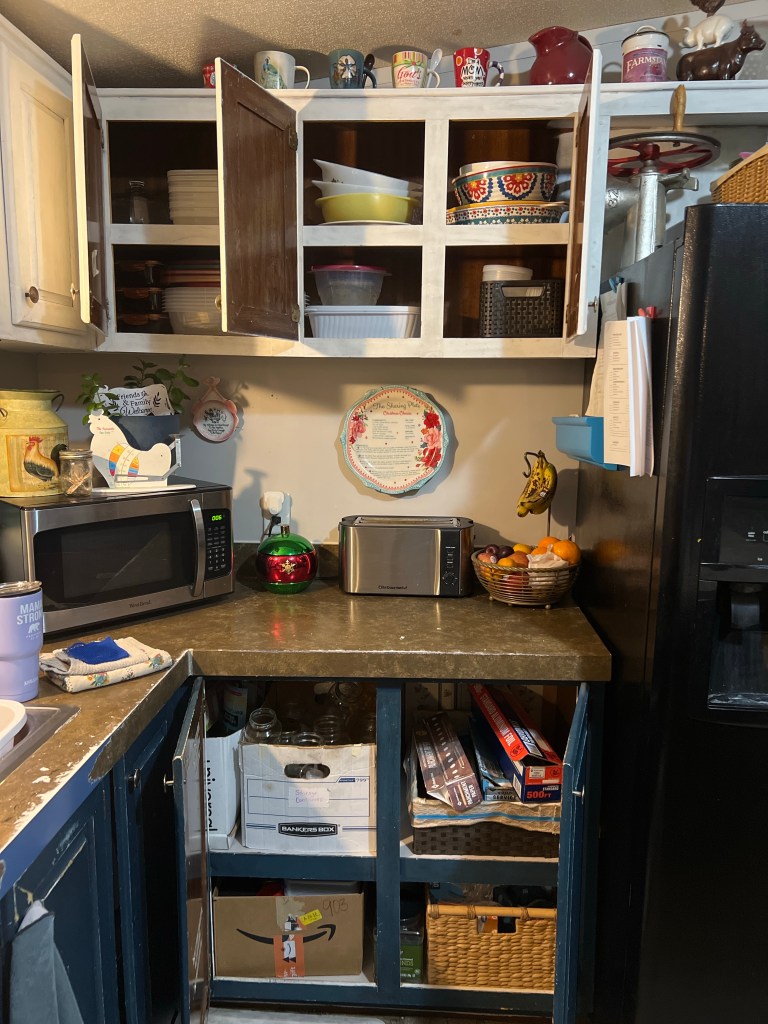
This photo shows the ‘food storage’ zone. I put the rarely used items on the top shelves along with my special serving dishes. The food containers are on the lower shelf which almost everyone can reach without a stool. We have the glass jars underneath along with the wraps and storage baggies.
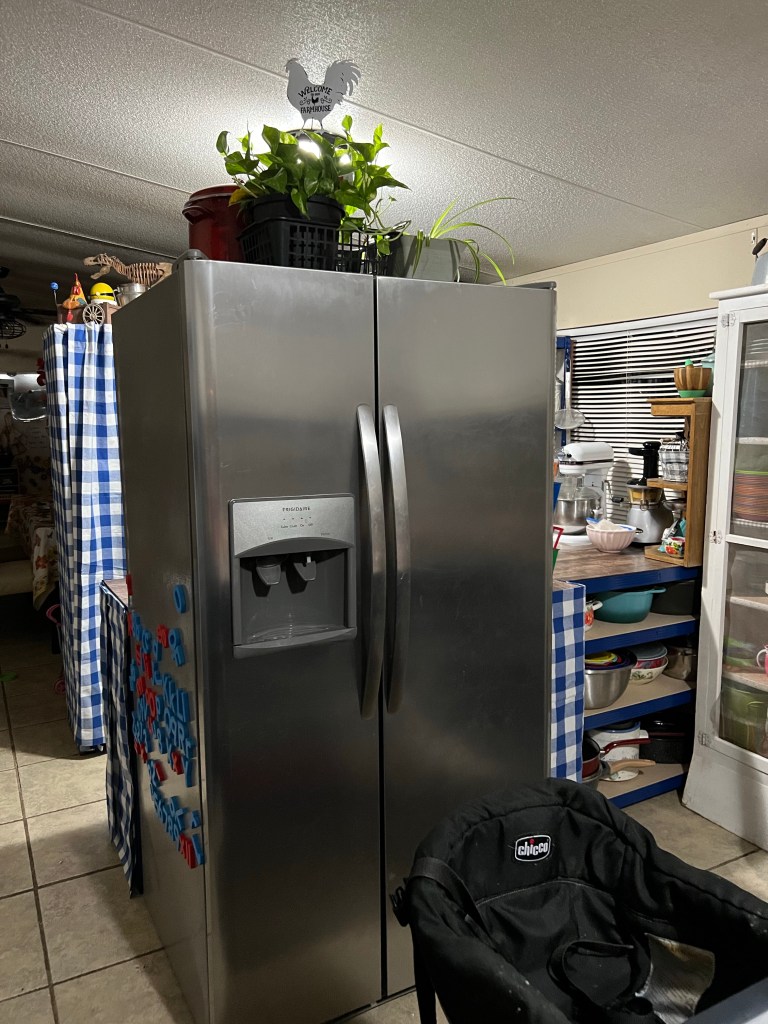
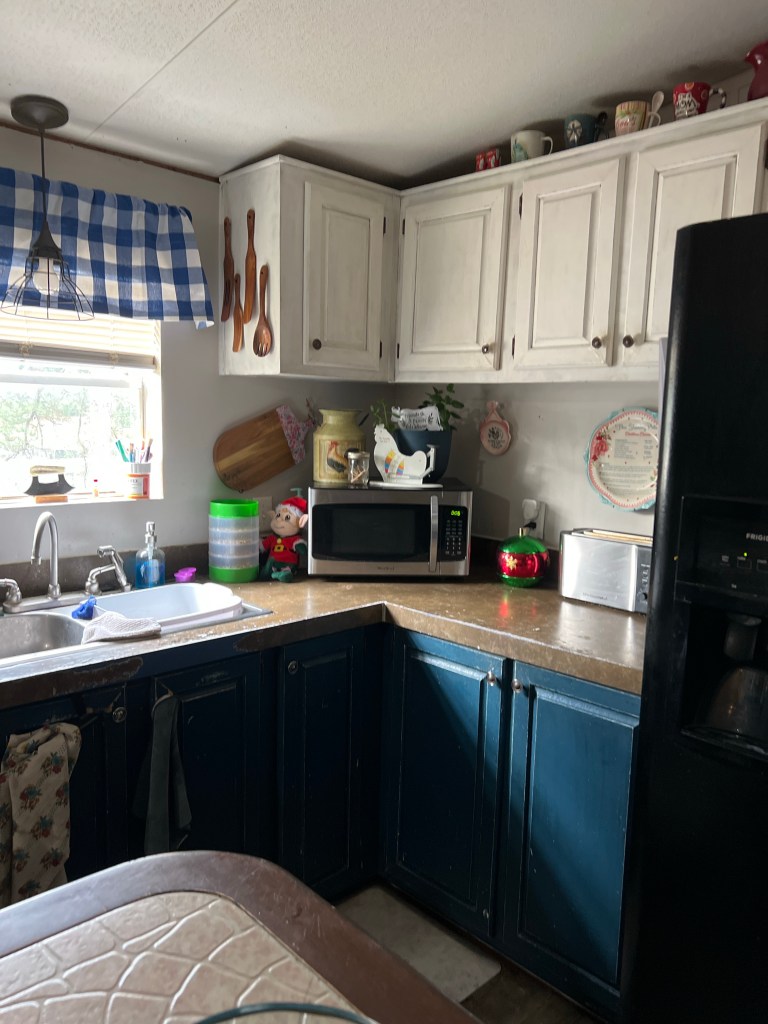
The small upper cabinet is mostly empty except for our salad spinner and the lower cabinet now houses the meat grinder and the meat slicer as we normally use them on this counter here. I placed the microwave at a diagonal in the corner as the corner is hard to access so this allows us more usable counter space and gives them a place to put their dishes down when they need to warm up things. The toaster is on this counter because the bread is in a basket on top of the refrigerator. This refrigerator is where we store most of the leftovers and this is working out pretty well too.
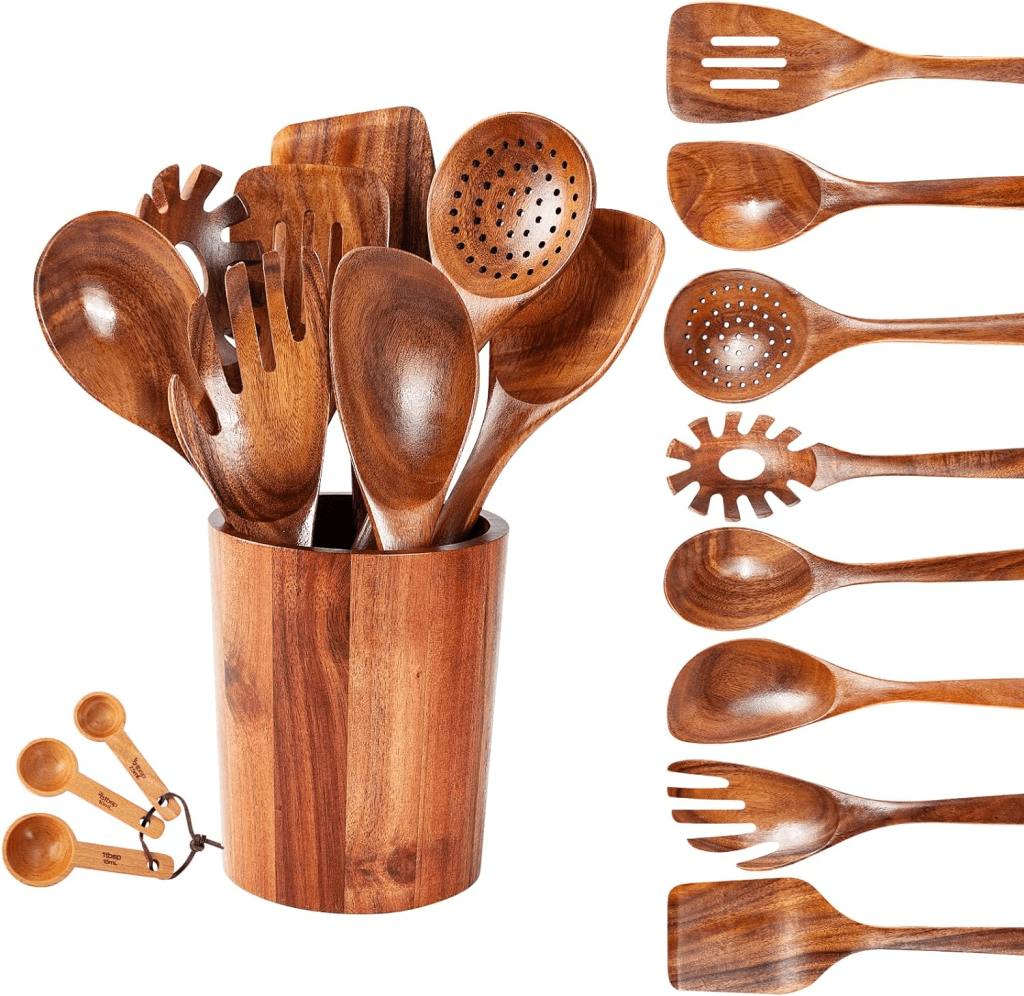
I really love the wooden utensils and they are so pretty that we keep them out on display. I have my eye on another set as well!
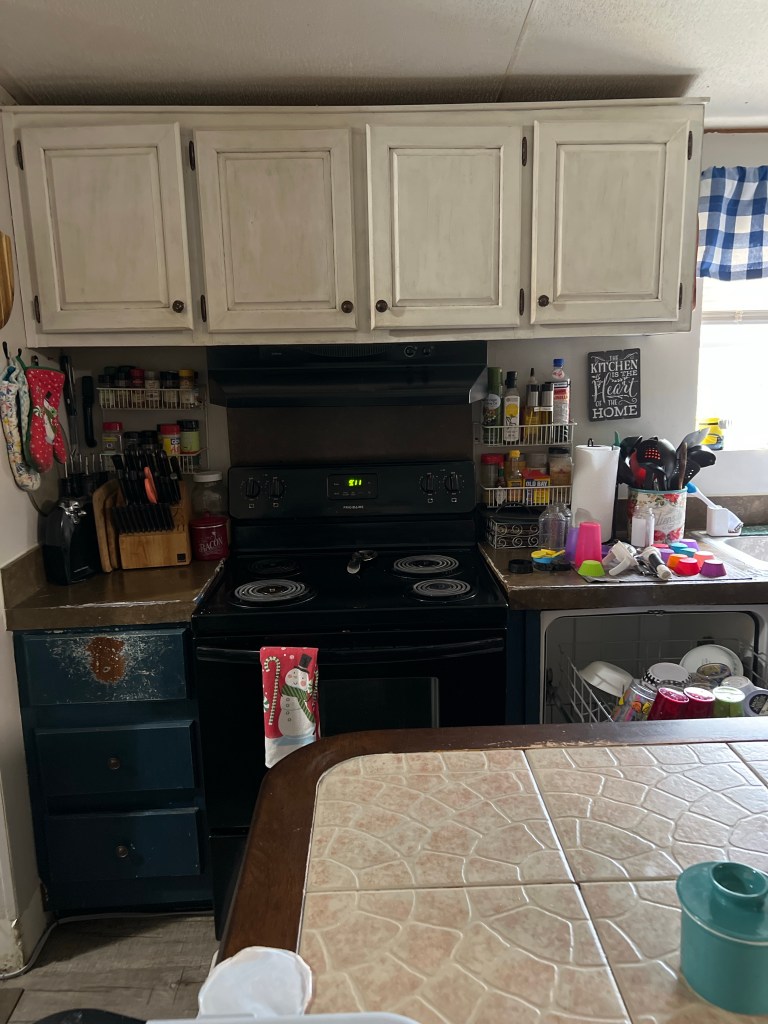

This last photo shows the ‘cooking zone’ where we have most of the spices and seasonings that we need. We also have our utensils, cutting boards, and knives close to this area as well and the pots and pans that we use most often are in the kitchen island behind the stove. The other pots and pans are in the pantry area. I did put Mr. Awesome’s spices and seasonings on the top shelf as he can reach them easier than I can.
You might notice that we don’t have a dish drainer and that is because my girls kept making water messes all over the counters which has led to the paint blistering and peeling in places. To help eliminate this issue I took the drainer out and we now use the dish drainer to hold the dishes as they dry and they put them away when they are finished. We also use a couple of dish-drying mats for the smaller items.
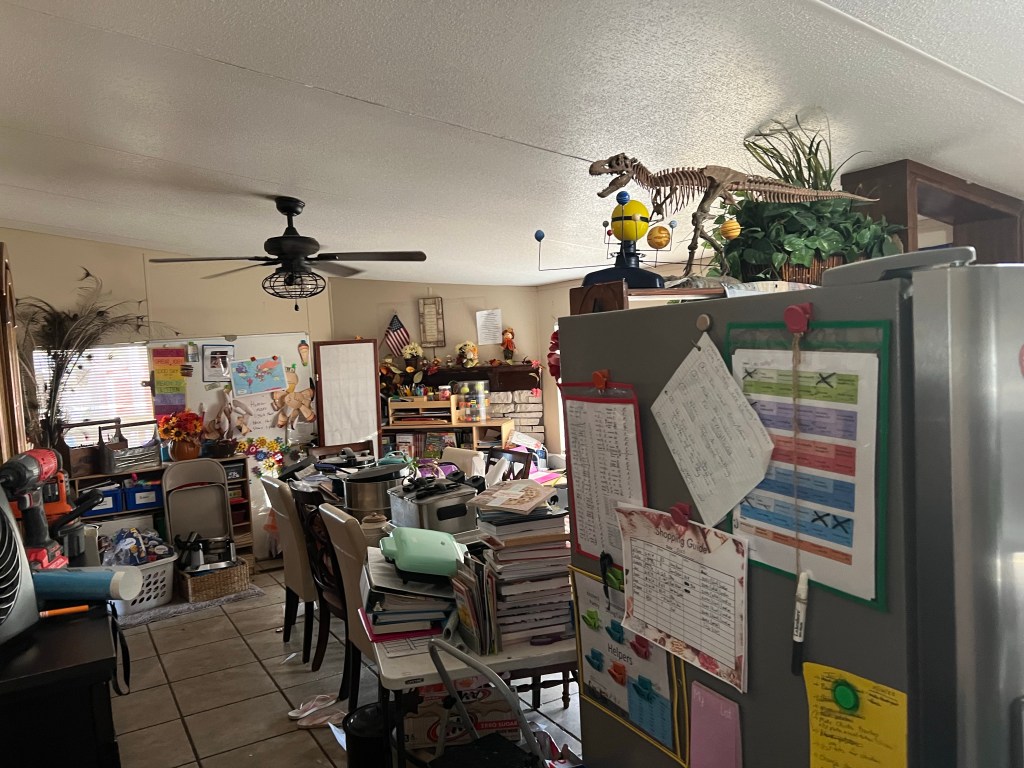
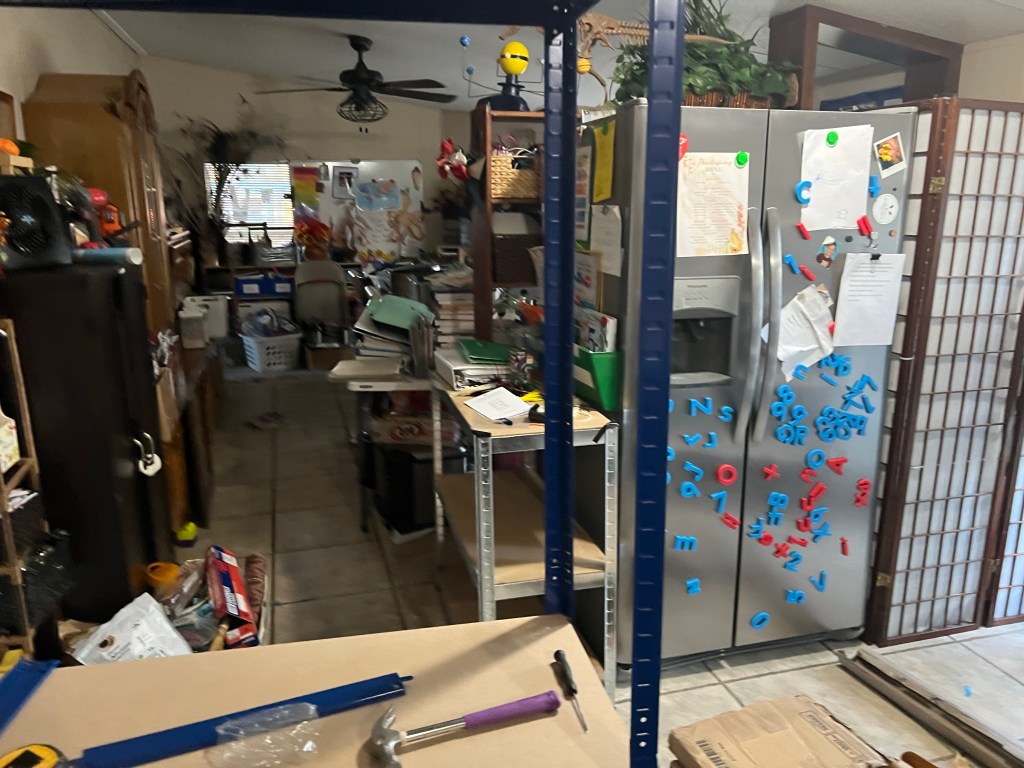
Here are a few more pictures of the rearranging that we have been doing:

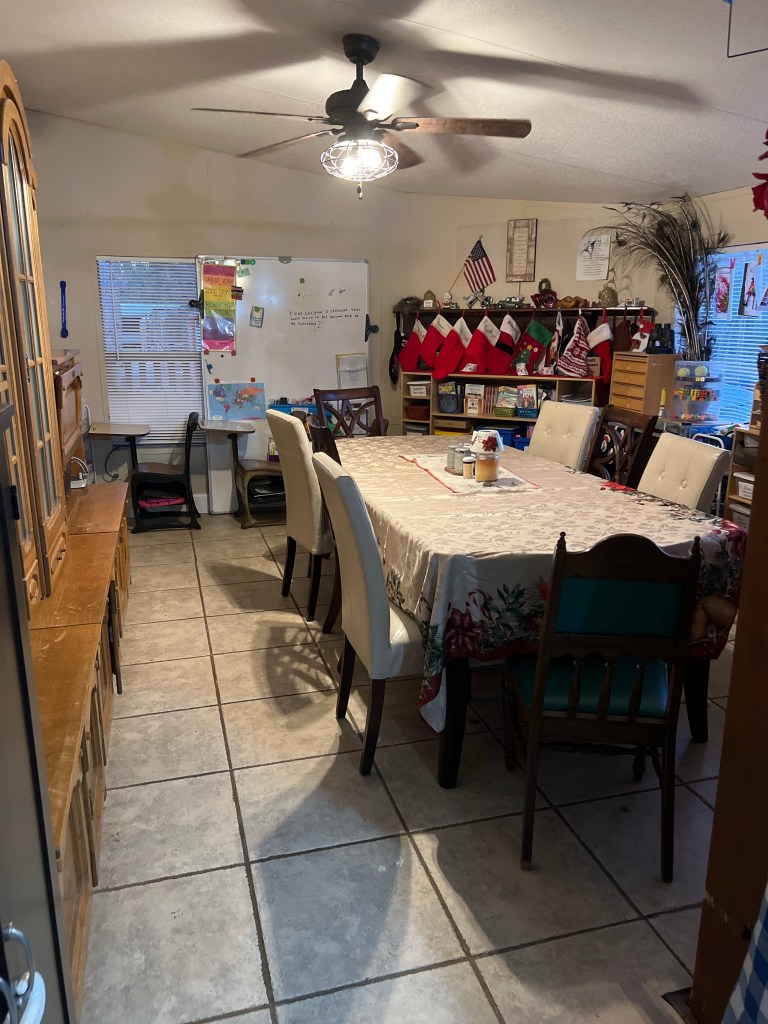
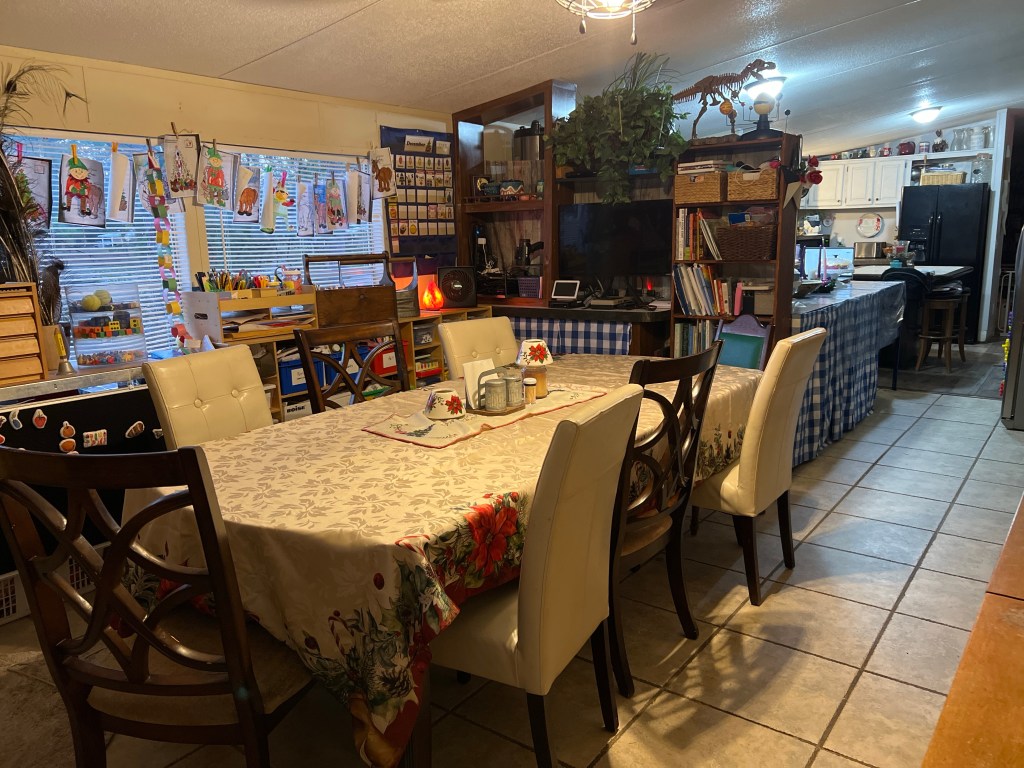
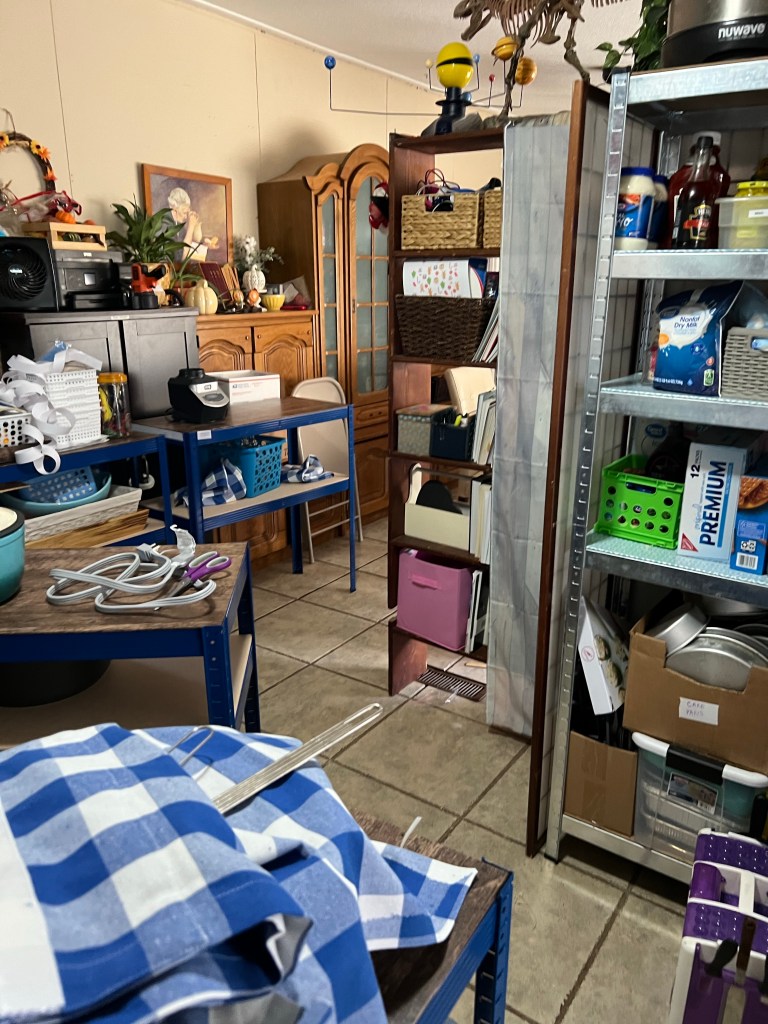
We worked in the homeschool/dining area too. We moved the desks to another wall and then moved the shelves in front of the windows… I’m not totally in love with this look but it works for now. The kids wanted to hang the stockings up so we had to take all of the usual things off the one shelf and crowd them onto the others. The kids put the new tablecloth on and added a few decorations in here plus they colored some pictures and made some elves to hang across the window.
When we rearranged the pantry the last time we ended up with a few extra curtain panels so we stapled them across the front of the built-in bookshelf that holds the kids’ school boxes… so much better! We also use some zip ties to hold the felt board up and cover the front of a shelf. This keeps Shyanne from dragging everything out and it hides some of the games and such that we use.
Our house still needs some cleaning and decluttering but every day it is getting better. We plan to tackle the kids’ rooms after Christmas so that will be a challenge as we have to completely empty one room at a time so that we can redo the walls, add walls and doors, paint, and change things around to work better. We will definitely try to take pictures as we go to show the progress and what we did.
The kids are so excited about the new pantry and they have been making all kinds of plans about setting it up for the Polar Express Party, movie nights w/cash register, birthday parties, and other projects that they needed room to spread out for. I can picture using the space to make some of the gifts we mentioned in this post HERE.
For now though, I need to get some breakfast started so I will get off of here and leave the links below to the items that I used. Have a blessed week!
**This post does contain some affiliate and/or referral links to products and/or services that we use. If you happen to click through a link and make a purchase we may earn a teensy-weensy small commission (at NO EXTRA cost to you) if a purchase is made through these links. These links help to support our family, our blog, and our homeschooling mission. This means that we can keep bringing you great recipes, ideas, and tips for FREE! Click HERE for a full disclaimer. –Thank you!
Items used for the DIY Pantry Makeover:
- Shelves: I got mine on sale at Walmart but you can find them on Amazon in a greater variety of sizes. These go together pretty easily and they come with gloves. I like the painted ones much better than the silver ones and I think they come in other colors besides the blue. I may end up using them in other areas of the house as well.
- Wood Look Peel and Stick Contact paper for shelves – I already had the aqua/white paper that I used on the pantry shelves so I don’t know where it came from.
- White Plastic Storage Baskets – I have a large variety of assorted baskets and bins that I have collected over the years but I needed something to hold the measuring cups and small utensils.
- Flip Tite storage containers –I already had some of these but I grabbed a few more to help keep things easy to access.
- Christmas tablecloth – I used this plastic tablecloth to cover the island and we have another like this for the table.
- Rustic Wood Shower Curtain – I used these behind the shelves to cover the ugly divider screens from the other side of the built-in bookcase.
- Heavy Duty Velcro – for hanging curtains around the ‘island’- I will probably staple them to the backside of the wooden countertop when we get it made.
- Heavy Duty Appliance Cord – I ended up not using this but it’s good to have on hand. I also bought this cord protector but didn’t use it either… more things for another project.
- Heavy Duty Surge Protector – You can’t see the surge protector in the pictures as it is zip-tied to a shelf and hidden behind a curtain but it is handy to have so I can use the small appliances at the new island.
- Gingham Window Panels – I bought these window curtains as I liked the fabric. I then cut them down and used the no-sew hem tape to make new edges for them before hanging them. The longer ones are hung by their tabs on an old shower curtain that uses a couple of large zip ties for the curtain rod hangers. The smaller ones are attached with the velcro listed above. I also added a couple of large safety pins where the curtains overlap as little Miss Shyanne likes to hide behind them and the safety pins give them a little more security.
- No-Sew Adhesive Tape – I used this instead of sewing all of the curtains.
- Anti-Fatigue mats – I had a couple of these that my sister had given me and they are so nice!
- Dynamo Label Maker – when it gave out on me I switched to this Brother Label Maker.
- Pioneer Woman Shelf Liner – not pictured yet but I will update the pictures when I add it!
- Dish Drying Mats – We have a variety of these to swap out as needed.
- Wooden Utensils – These are the ones I have my eye on HERE.
I think I’ve listed most of the items that we purchased/used for this project but if you see something then please let me know in the comments below.
Aren’t they pretty?

8 thoughts on “DIY Walk-In Pantry Makeover #2”