
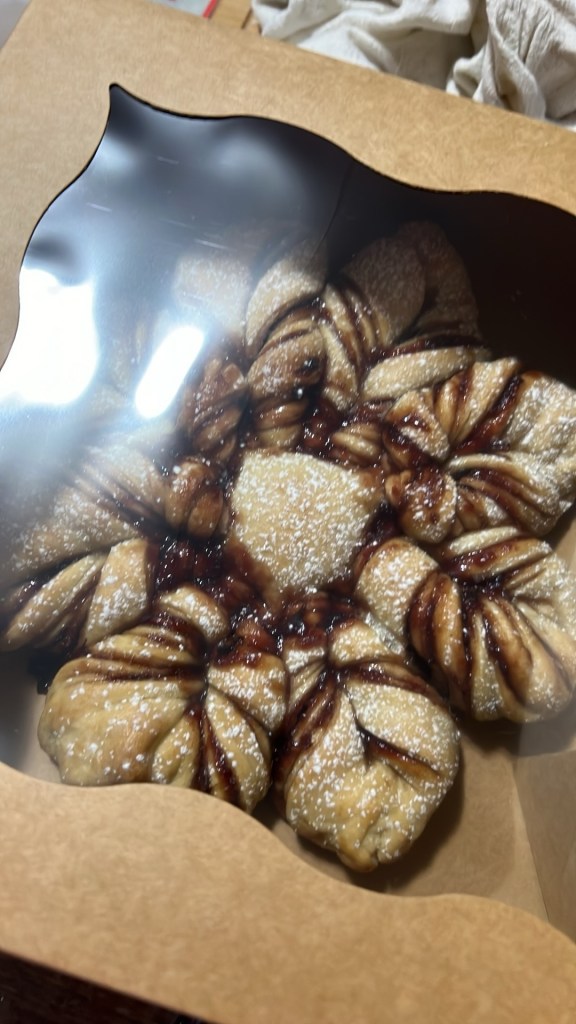
This has been one of our favorite Holiday Recipes for the past couple of years, and everyone looks forward to getting these as gifts. The cover photo is from last year, when we used Rosella Jam for the filling!
The recipe and instructions are very long and a little time-consuming, but you could also buy the premade crescent dough and use that in place of the sourdough. You would just use the filling of your choice, a glaze or icing, and then bake about 15-20 minutes or until golden brown.


**This post does contain some affiliate and/or referral links to products and/or services that we use. If you happen to click through a link and make a purchase, we may earn a teensy-weensy small commission (at NO EXTRA cost to you) if a purchase is made through these links. These links help to support our family, our blog, and our homeschooling mission. This means that we can keep bringing you great recipes, ideas, and tips for FREE! Click HERE for a full disclaimer. –Thank you!
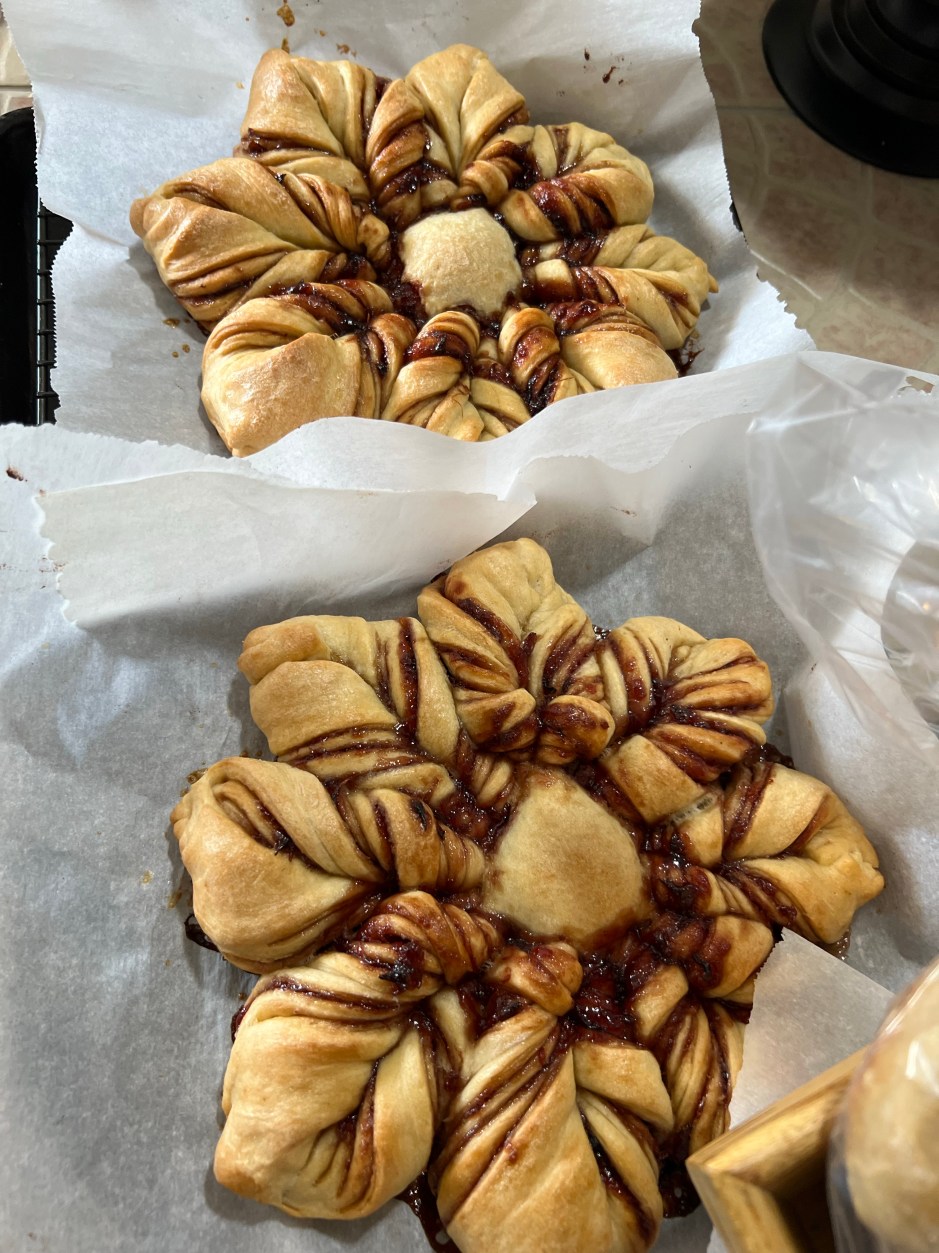
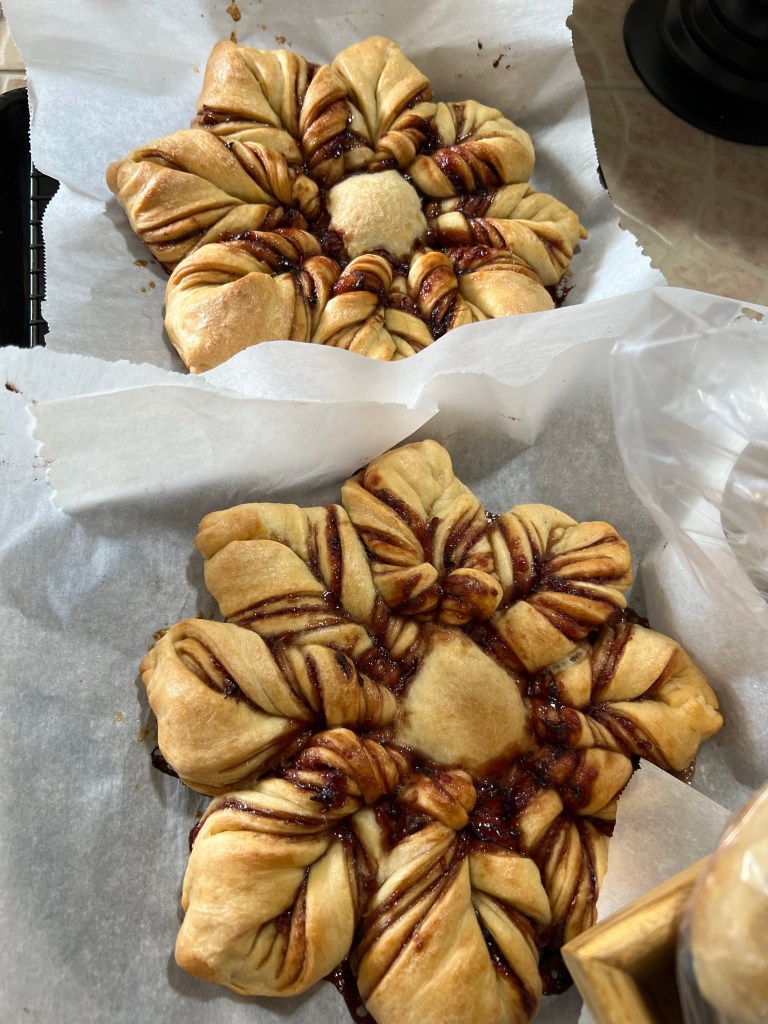
Christmas Breads – makes 2 large breads or 4 small ‘gift-sized’ breads
Ingredients:
- 4 ½ – 5 c. all-purpose flour
- ¼ c. sugar
- 2 t. baking powder
- 2 t. salt
- 2 ½ t. yeast, optional
- 1 c. butter
- 2 c. milk or milk kefir
- 1 c. sourdough discard
- Heavy cream or additional egg, optional
Cinnamon filling – other options are listed at the end of the recipe:
- 2 sticks of butter
- 1 1/2 c. light brown sugar or use a mixture of brown and white sugar
- 1 T. ground cinnamon
Topping, optional:
- 2 c. powdered sugar
- 2 T. butter, melted
- 2 t. vanilla
- 4-6 T. milk
Directions:
Stir together the dry ingredients and then cut the cold butter into the flour mixture, until crumbly.
Add the milk and sourdough discard, mix until it forms a dough that sticks together. Knead for 5-10 minutes.
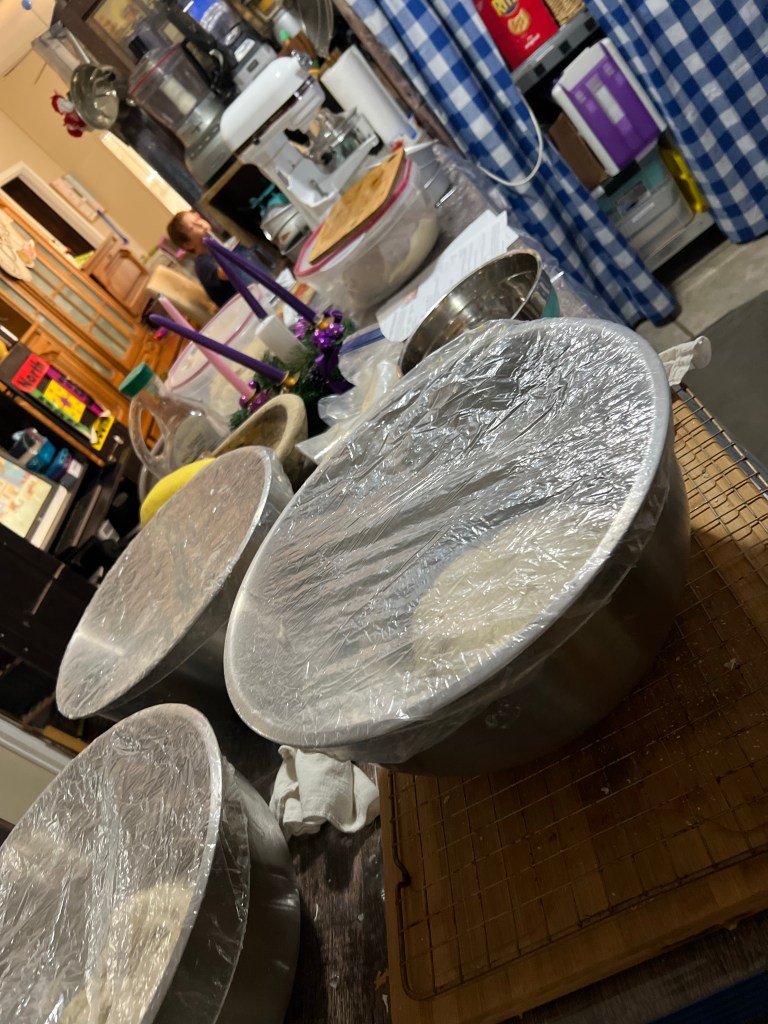
Place it in a greased bowl and cover. You can let it rise on the counter for 3-4 hours or put it in the fridge for 8-12 hours to ferment.
After rise/ferment:
**You may want to watch a video about the shaping of a Christmas Star but I will try to explain it the best I can. The first time making it can be a little tricky, but it gets easier… you may also want to see my notes at the end for making a wreath or knot as it may be a little easier.
Pull the dough out of the fridge, if needed.
Combine the filling ingredients in a small pan until melted and mixed together, set to the side.
Divide your dough into 2 or four equal parts, depending on how many breads you plan to make.
Take one portion of dough and divide that into 4 equal parts. Roll these parts into a small ball and let rest for 5-10 minutes.
Lightly flour your surface or use a silicon mat. Next, roll each part into thin circles of equal size … not too thin that it breaks easily. I like to roll all four out and place them to the side with a piece of parchment paper to separate them.
Place a piece of parchment paper on your baking pan, or cast iron skillet, and lay one circle on the paper. Spread a thin layer of filling over this, leaving a small rim around the edge.
Repeat with 2 more circles, leave the last circle with no filling.
Next, gently smooth out any lumpy areas, and press the edges together lightly.
First, I take a small biscuit cutter or jelly jar and lightly make an imprint in the center of the dough.
Next, I use a pizza cutter or dough cutter to make 16 cuts from the edge of the dough to the imprint that I made in the center.
Then, I take two of these small sections and twist them away from each other, 3-4 twists, and then press them together at the end. Repeat this twisting process until all the pieces are joined together with another one and form a pretty star.
I then let this rest as the oven preheats to 350 degrees.
Before baking, you may brush with heavy cream or with an egg wash (one egg mixed with 1 Tablespoon of water).
Bake for 20-30 minutes for the large or 15-25 minutes for the smaller ones, or until lightly browned… keep a careful eye on it for the last few minutes as the butter and sugar will burn easily.
Remove from the oven and allow to cool slightly.
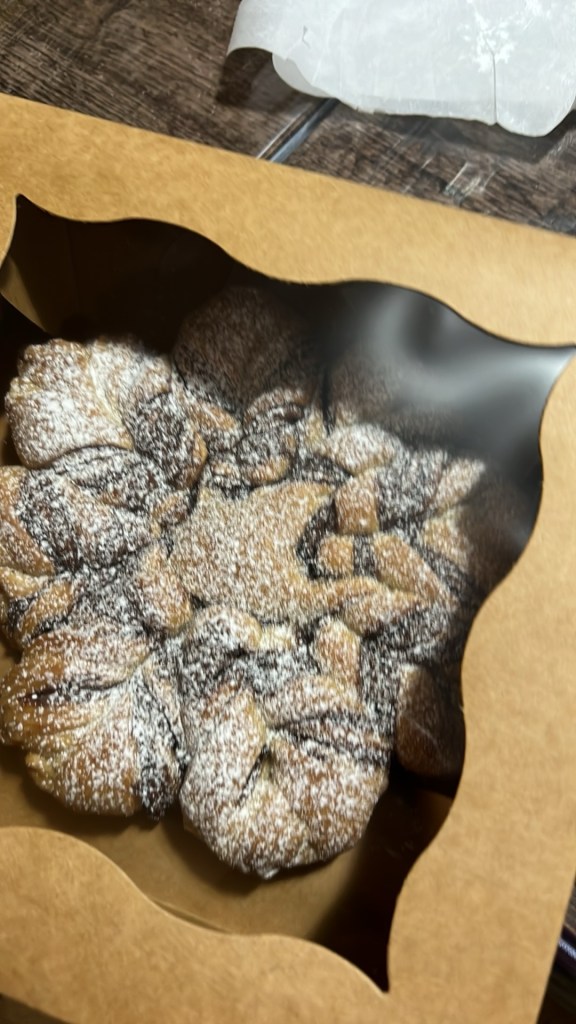
If eating it right away, then you can add a dusting of powdered sugar or a light glaze of icing. There are additional icing/glaze recipes at the end.
While baking, you can mix together the ingredients for the icing, if desired.
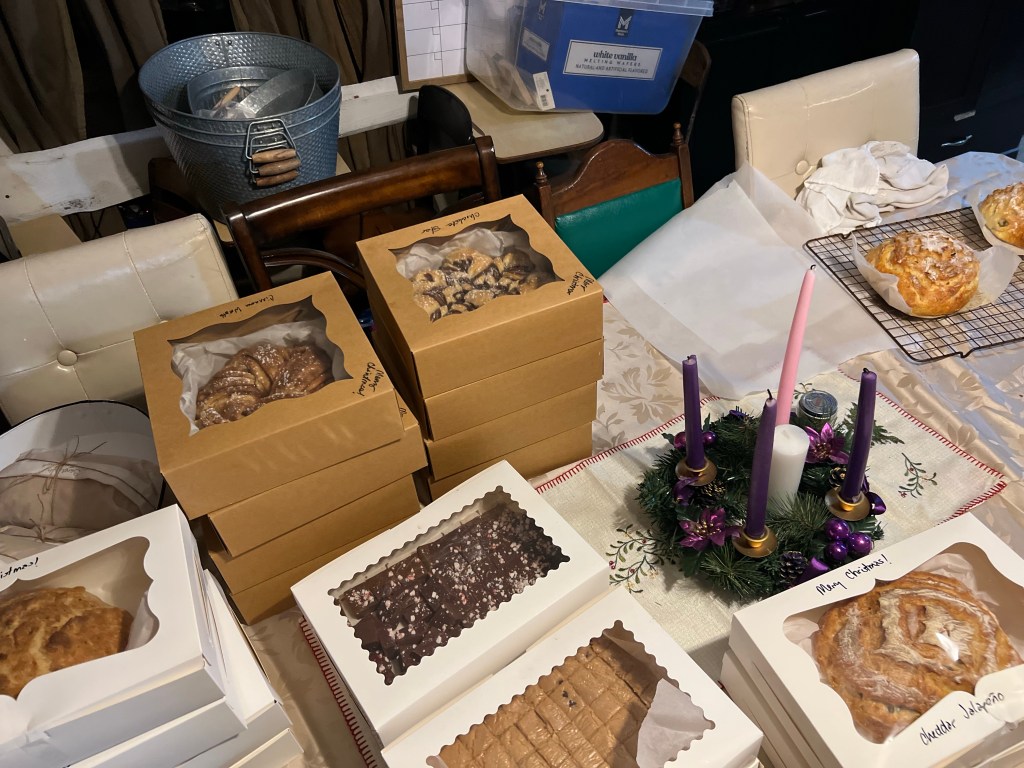
If you are gifting these, then you will want to allow them to cool completely before wrapping or boxing them. I like to put them in bakery boxes from AMAZON, which I will link below, but you could also wrap them with parchment paper and a simple string.
Instruct the gift recipient to warm the bread up at 350 degrees for 5-10 minutes before serving. You can also gift them a small amount of icing to spread over the warmed bread. Make sure to save some bread for your Christmas Breakfast!
CHERRY 25-PACK 10″x10″x3″ Brown Bakery Boxes with PVC Window for Pie and Cookies
Moretoes 30pcs Bakery Boxes, 8x8x2.5 Cookie Boxes with Window
Freshware Food Storage Containers
NOTES:
You may find that you need to make additional filling mixture as it is hard to estimate how much you are putting on each one, unless you carefully measure them out. Even then, factors like humidity and taste testers can alter the amount of filling/glaze you will need.
Additional Filling Ideas:
- Nutella
- Jellies or Jams
- Chocolate Filling:
- 2 sticks of butter
- 1 1/2 c. light brown sugar or use a mixture of brown and white sugar
- ½ c. cocoa
- 1 t. salt
- Mix together like the original recipe.
- Gingerbread Filling:
- 2 sticks of butter, softened
- 1 1/2 c. light brown sugar
- ½ c. molasses
- 1 ½ T. ground cinnamon
- 1 T. ground ginger
- 1 t. ground nutmeg
- 1 t. ground cloves
- ½ t. salt
Mix this together with a fork or small hand mixer until soft and smooth. Spread on the dough.
Additional Icings/Glazes:
Cream Cheese Frosting:
Mix together with a small hand mixer and a little cream, milk, or water to thin as needed.
Molasses Glaze:
- 2 c. powdered sugar
- 2 t. molasses
- 1-2 T. water
- Mix together and add water to thin.
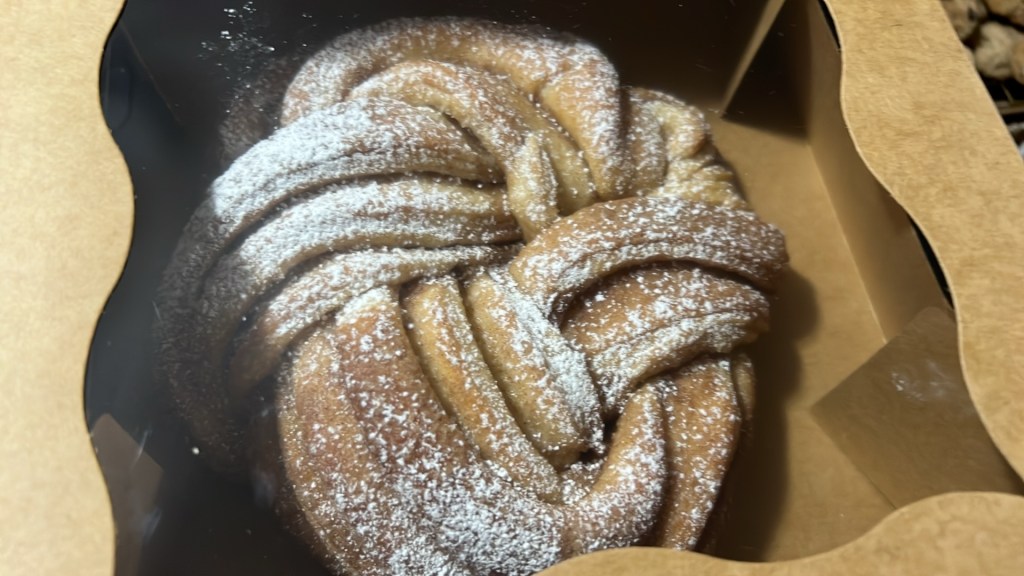
**Directions for making a Wreath/Knot:
After rise/ferment:
Pull the dough out of the fridge, if needed.
Combine the filling ingredients in a small pan until melted and mixed together, set to the side.
Divide your dough into 2 or four equal parts, depending on how many breads you plan to make.
Sprinkle a bit of flour on a clean work surface.
Gently pat into a rectangle… you want it thin but not too thin as you will be rolling it up.
Top with the filling.
Gently roll the dough into a log and pinch the seam and ends together. You could slice into rounds for ‘cinnamon rolls’ at this point.
Pinch one end of your roll together and then gently roll it so the seam side is facing down.
Carefully cut the roll into two pieces, leaving the pinched end uncut. Then carefully twist the two pieces together and form into a circle shape for a wreath or knot look.
You could also form the log into a circle shape and make slits along the sides, if you want more of a wreath look.
Finish as directed in the original recipe.
Bread Baking Timeline:
I make a lot of these and the Sourdough Boules for Christmas gifts so I have a little timeline that makes it so much easier. Here are my personal notes:
- 2 Days Before:
- Feed Sourdough Starter, if needed
- Day Before:
- 8:00 AM -Mix & Knead the dough.
- 9:00 AM – Cover and bulk ferment.
- 5:30 PM – Roll out, spread filling, and shape.
- 6:00 PM – Allow to rest for one hour and then cover w/plastic wrap and place in fridge overnight.
- Day Of Baking:
- 7:00 AM – Remove from fridge and allow to come to room temperature. Only remove a few at a time… whatever can be baked.8:30 AM – Start baking and get the next batch prepped for the oven. If we are eating this for breakfast, then we will sprinkle with powdered sugar or glaze and then eat!10:00 AM Prepare the icings/glazes and package for gifting.
- 1:00 – 3:00 PM – Start boxing/wrapping… Label as you go so you don’t forget what is what.

5 thoughts on “Christmas Breads with Baking Timeline”