

I know I’ve mentioned in a few posts that we’ve been making our own bread again. We love sourdough bread but a few of the kids had mentioned that they really wanted something more like store-bought so I tried a few recipes and with a couple of tweaks we have found a combo that we really like… Mr. Awesome and I haven’t been eating much bread but we have tried a slice here and there as it smells so good! It is quite exceptional when it’s still a little warm and smeared with real butter and then drizzled with a bit of local honey… mmmmm!
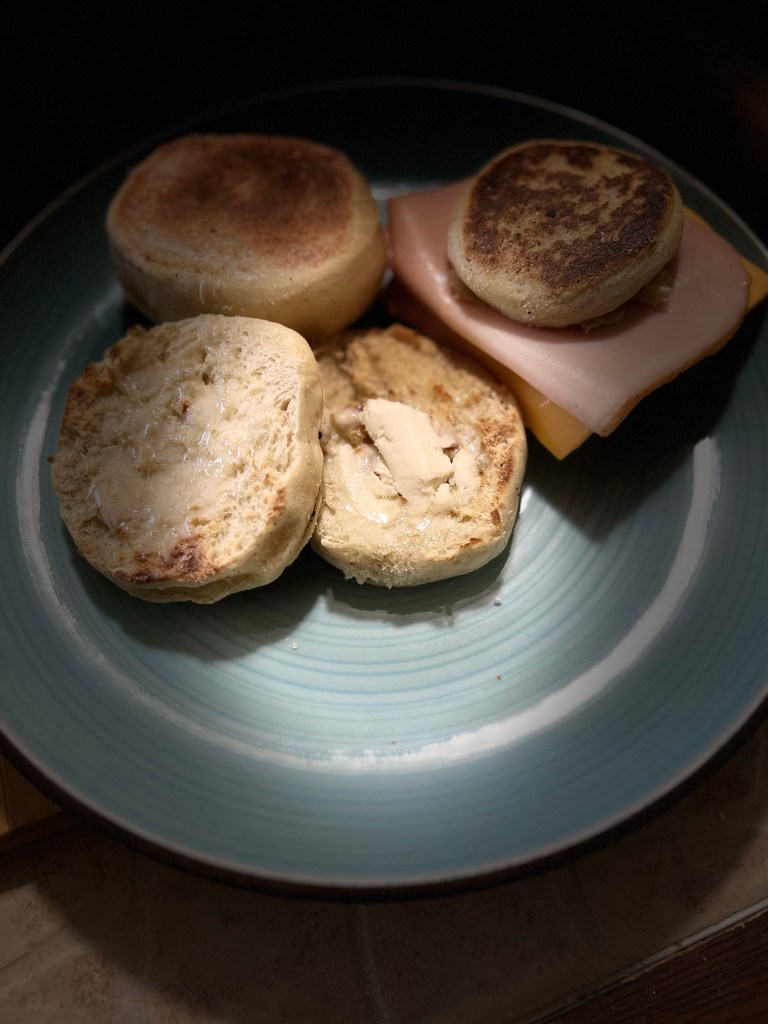
This bread is great to use as rolls and as an alternative to English Muffins for breakfast. It also toasts up really nicely! We save all the breadcrumbs in a baggie in the freezer to use in our recipes where breadcrumbs are needed.
I recently converted my sourdough starter ‘Fran’ to a pasta madre/lievito madre/stiff dough and I like the results so far. You can learn more about this process HERE. I think I want to try to make some Panettone for Christmas this year so I wanted to get some starters going and get a little more familiar with the process.
I’ve also been researching about the Herman starter and Charlie starters so I may want to them out as well.
Easy Homemade Bread
Ingredients:
- 1 1/2 c. lukewarm water
- 1 T. active dry yeast
- ¼ c. honey or sugar
- 2 t. salt
- 2 T. oil or melted butter
- 2 T. kefir, sour cream, or plain yogurt (optional but adds fluffiness)
- ½ c. active sourdough (optional but we like the taste)
- 5-7 c. flour (depends on whether you added the kefir and/or sourdough)
Directions:
Combine the water, yeast, and honey or sugar in a large bowl. Let sit for 5-10 minutes or until foamy. If it doesn’t foam up then your yeast may be bad and you may need to try again with fresh yeast.
Add the remaining ingredients except for the flour. Stir well to combine.
Add 4 cups of flour and mix well. I like to do this in my stand mixer, but it could be done by hand as well.
Add the flour, ½ c. at a time, until the dough starts to pull away from the sides of the bowl. It should be smooth, stretchy, and slightly sticky. If it is very sticky you may need to add a little more flour.
Continue to mix with a dough hook or knead by hand for 5-10 minutes.
Next, add some oil to the bowl and roll the dough ball around to coat all sides.
Cover and let rise for 1-2 hours or until double in size. You can put it in the cold oven with the light on to help it rise better.
Thoroughly grease 2 9×5 loaf pans… you can add some parchment paper to the bottoms and sides if you like but it is not necessary. I also like to use a long pan like this sometimes.
Punch down the dough and divide it into two. Shape your dough and place it into the loaf pans. This can also be shaped into rolls – we make about 12 medium-sized rolls per loaf.
Cover and let rise 45 minutes to an hour or until slightly above the sides of your pan.
Preheat your oven to 425.
I like to brush the tops of the dough with butter and make a slit down the centers with a razor, but it is not completely necessary to do this.
Once the oven is preheated I place the loaves in and cut the temperature down to 350. Bake for 3-35 minutes.
Remove from the oven and let cool for 5 minutes and then remove from pans to wire racks.
You can brush with additional butter at this point, if you like.
Let cool for at least 10-15 minutes before slicing. We store the sliced bread in Ziploc baggies on the counter and it is gone quickly but you could put it in the refrigerator if needed.
Make Ahead:
This bread dough is even better if you let it sit in the fridge for a day or two after the first rise. Just make sure to use a large container and cover it well! You can shape it before you refrigerate to make things a little easier.
When ready to bake just pull it out and let it sit on the counter for an hour or two until doubled and then bake as directed above.
For Honey Oat Bread:
Add 2 T. honey to the bread dough and sprinkle with oats after shaping for the final rise. You may want to brush a little water on the dough to get the oats to stick a little better.
If you use your oven to raise your bread then you may find this printable placard very handy. We also like to use this long loaf pan ** for our bread but you can bake it in two smaller ones with no changes to the recipe. I recently purchased this gadget for slicing the bread but I do have my eyes on this bigger one HERE. I may also purchase some of these bags so that I can put the whole loaf of bread in one bag instead of having several smaller ones. I DO NOT recommend the bamboo ones as they leave little splinters of wood in/on your bread!
**This post does contain some affiliate and/or referral links to products and/or services that we use. If you happen to click through a link and make a purchase we may earn a teensy-weensy small commission (at NO EXTRA cost to you) if a purchase is made through these links. These links help to support our family, our blog, and our homeschooling mission. This means that we can keep bringing you great recipes, ideas, and tips for FREE! Click HERE for a full disclaimer. –Thank you!

16 thoughts on “Easy Homemade Bread”