
In one of my last posts, I showed a quick peek of how our remodel was going and how one thing always leads to another. Well, it is finally finished and it is looking so good!
These were some of the ‘Before’ after we had just finished a major decluttering:


This layout was working out pretty good and then we decided that we should go ahead and finish up the hallway. This meant that we needed to clear the one wall in the living room. Well, I got the bright idea that if we were clearing one wall then we might as well clear all of them so we could just tackle it all at once… it sounded like it would be a good idea and it was but it did turn into a bigger project than we first anticipated so it took a little longer than expected.
Here is a mid-progress so you can see how my ‘bright ideas’ added on some work… or did they take away some work?


I mean, there is now less wall to deal with but I know that there was a little extra framing and trim work to do. Either way, it looks great and we LOVE it! We do have plans to make a wood counter for this space but that will have to wait a bit as we are in a bit of a time crunch right now.

I’ve been wanting to open that wall up so Mr. Awesome decided to make it happen and I think he really likes it too! We have some other plans for this area but we have to sit down and really plan out what we want for the kitchen before we do anything else here.
We patched the walls in the living room and the kitchen and then Mr. Awesome textured the walls. He removed the batten strips in the living room but we left them in place in the kitchen as that room will be getting a full makeover soon enough. We then repainted those areas and added some new trim.


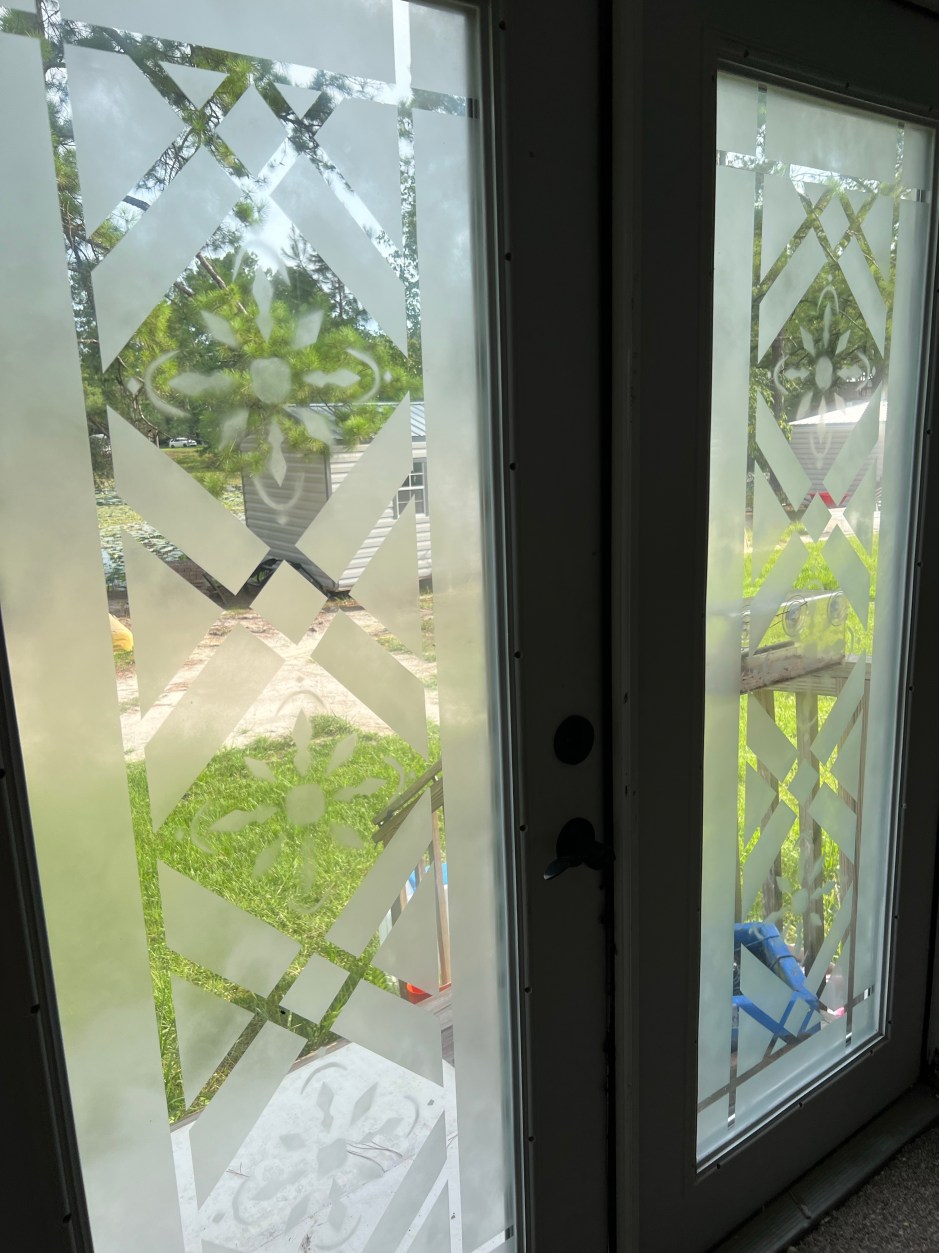
I also decided to add some decor to the windows and then Mr. Awesome liked it so much he wanted the patio doors done as well… they looked so good that I went back and redid the front windows to match! I also did something a little bold… I painted the front door BLACK! I only did the inside as the outside would have probably caused the house to get way warmer than it already does.


I used the frosting spray that I originally bought for this DIY HERE and I also used this same spray for the girls’ room makeover HERE. I didn’t want to buy stencils so I made some from regular paper… kind of like cutting out snowflakes. The black paint is the same paint I used on the girls’ bunk beds.


I will be removing the blinds and doing this to most of the windows as the heat (and kids) destroy blinds in no time at all. It’s so easy to make designs with masking tape and if you don’t like it then it will scrape off easily with some window cleaner and a scraper.
After all the painting was finished we gave everything a really good cleaning from top to bottom and scrubbed the carpets really well. There was so much dust! We also washed all the walls and wiped down everything in the other rooms… kind of like a MEGA Spring cleaning. We used SW Alpaca for the paint color.


I played musical furniture in the living room and Mr. Awesome did not like my original furniture placement plan when it came to where the pool table is… sigh. I was not happy and I pouted a bit. I had to rework my plan and move the tall cabinets to the dining room area which messed up my plans for that room… one thing led to another bit of remodeling again as you will see in just a bit.
Please excuse me for a moment as I just realized that I haven’t taken any recent pictures of the living room…. I’ll be right back!


These are pictures of the ‘lived in’ look… the great thing about the major decluttering that we’ve been doing is that we don’t have as much to clean up and it only takes a few minutes to get everything ‘back to ready’… we are all LOVING that! That old computer desk is just waiting to leave… any takers?
This final arrangement is working out pretty good for us right now. We would like to eventually get some different furniture but we have made the old furniture work by cleaning it up, adding some decorative paper, and a little paint here and there. Everything looks a little more cohesive now. The curtains that we bought last month look so good with the paint color as well… almost like we had planned it that way 🙂


The newer refrigerator also had to find a new home after we took down the wall where it had been… lol. If you remember from my last pantry remodel I just couldn’t get my layout quite right and I switched it around so many times that everyone was getting a little aggravated with me. Well, the same thing happened this time and Mr. Awesome was getting a little aggravated with me.
I was a little aggravated that I had to squeeze those tall bookcases into this space and that had messed up some of my original plans. I just couldn’t get things arranged in a way that really worked for everyone. He ended up tearing out that old built-in bookcase so that we could get everything to fit a little better.


This made such a difference in this space… has me rethinking the idea that I wanted to have the dining room area closed off the make a ‘den’ later on… hmm… so many ideas going through my head! We now have quite a bit of extra walkway that we’ve never had in this area before. It is really nice and keeps things from getting so ‘congested’. I’m not crazy about the placement of the refrigerators right now but that will change when we remodel the kitchen.
I did swap out islands around to help with the congestion in the kitchen… the island with the stools is a little wider than the other and it made it a little tricky when the dishwasher and/or stove was open. We couldn’t get to the pots and pans and it was just a pain so this is much better.


I also kind of like the open shelves so that may be something we consider keeping in the future. Having the other island in the breakfast nook gives me a place to have my morning coffee and I have been using it to set up my computer and books for school. This also gives me room to do one-on-one work with the kids when they need help.
I have a plastic tablecloth over the open shelving ‘island’ just until Mr. Awesome can make me a top with a piece of plywood that he has. The shelves have gaps and I don’t want anyone spilling anything down through the gaps and all over the dishes and such. We may also make a new top to slip on the other island as well because those grout lines are a pain to clean!


You might notice that we have plywood floors and that my counters are back to their original form. I got tired of stubbing my toes on the floor as it kept coming up in places so I ripped it up one day. The counters were having a hard time as the girls kept leaving water all over them and messing them up so I scraped them off. I tried steaming the paint off with the steam cleaner and that worked OK but the heat gun and scraper worked the fastest although it was a bit smelly.
We have primed the MDF backsplash until we can decide what we want to do with it. We have some ideas like doing the Carrerra marble paint or epoxy or possibly doing wood counters but I don’t really want to spend a lot of money until we can afford to replace some of the cabinets at the same time. We also need to make a decision about the kitchen floor but it may just end up getting painted for now as I would really like to put down the same flooring throughout the main areas of the house.
**This post does contain some affiliate and/or referral links to products and/or services that we use. If you happen to click through a link and make a purchase we may earn a teensy-weensy small commission (at NO EXTRA cost to you) if a purchase is made through these links. These links help to support our family, our blog, and our homeschooling mission. This means that we can keep bringing you great recipes, ideas, and tips for FREE! Click HERE for a full disclaimer. –Thank you!
One of the best parts of this DIY was that it didn’t cost us very much at all as we already had the majority of the supplies on hand from previous projects. We did have to buy a few small things like another roll of masking tape for the windows as I couldn’t decide on a pattern I liked so I wasted a bit of tape. **I also purchased some more peel-and-stick contact paper, a small roll of wallpaper for the cabinet, a couple of slip-on chair covers as some of our chairs had rips in them, and some new filters for the air return as the old ones were covered in dust.


I’m so happy that we’ve been able to incorporate some of our older pieces into our new arrangements so that we can enjoy them! I think this paper adds a cute pop of color and it can be easily removed if I decide I don’t want it on there anymore. I also used a bit of this paper on the little lamp in the living room and I used the wood-look contact paper to redo the top of the small table.
We are slowly making this house a home… room by room but we are making progress and it is motivating us to keep going. We are so thankful for all that God has blessed us with and we just want to be good stewards of what we have. We hope that posts like these can encourage you to make the changes that you’ve been wanting to make. Mr. Awesome is in the drywall business so he does have leftovers here and there and we do have the tools needed to make these kinds of changes to our home but even if we didn’t we could still patch holes and paint walls to help make things look a little better… do what you can with what you have!
Thank you all for checking in on our progress!
May God Bless You!

5 thoughts on “Livingroom Remodel… it looks so good!”